Sunday, September 25, 2016

We're on Hiatus...

I know it's been a while since I shared a new recipe, and it may be a bit longer. But it's for a good reason, I promise. :)


That's our little nugget - due Jan 2017. Understandably, it's been a bit of a distraction so I haven't been getting particularly inventive in the kitchen. Especially as during my first trimester the smell of cooked meat turned my stomach. I'm thankfully over that phase and eating normally again, but I might have to put the Mmmms on hold for a bit. You'll still have my recipe archive to flip through, and hopefully once I get the hang of this new mommy thing I'll be back in action.

In the meantime, stay well my friends!

Monday, January 11, 2016

Roasted Marrow Bones


If it seems crazy to you that we'd eat the marrow out of bones, let me remind you that this is about as primal and ancient a dish as it gets. Many animals, and our very own ancestral humans, crack open the bones of animals and suck out the delicate marrow. For primal hunters living off the land, the marrow served as an excellent source of nutrition - protein, healthy fats and fat-soluble vitamins, etc etc etc.

Now, I'm all for modernizing so I get my bones pre-cut from the grocery store and roast them prior to consumption. Your butcher can also be a good source for marrow bones - ask for beef, veal, lamb, etc. And the best part - they're super cheap!

If you've never had bone marrow you may be wondering how to eat it or serve it and you've got a few options. Note that the marrow is very rich with a high fat content so you likely would only eat 1-2 bones depending on their size. And here's how:
  1. Serve 1-2 marrow bones as a standalone appetizer. You can leave them plain or make an oil-based sauce as a topper (e.g. olive oil, parsley, and garlic or even an olive tapenade, etc).
  2. Serve 1-2 marrow bones on a bed of simple greens with a dressing of olive oil, lemon and salt.
  3. Scoop out the marrow and serve it rubbed over a steak (grill the steak first).
  4. Scoop out the marrow and serve it spread on Paleo crackers.
So many ideas! Now if you make these, save the bones in the freezer when you're done eating the marrow and you can use them to make a healthy and budget-friendly stock. Stay tuned for the bone broth recipe!

Ingredients
  • Marrow bones (I used beef)
  • Coconut oil
  • Salt and pepper
  1. Preheat the oven to 400F and line a roasting pan with foil
  2. Lightly coat the bottom of the pan (on the foil) with coconut oil so the bones won't stick to the foil
  3. Arrange your bones in the pan and sprinkle with salt and pepper
  4. Roast for about 15 minutes, until you see the marrow begin to bubble
There are special marrow spoons you can buy for eating it out of bones, but a seafood pick/fork, espresso spoon, or even chopstick would work fine. You can also go primal and suck it directly out of the bone when no one's looking. 

Enjoy!


Sunday, November 8, 2015

Omelette Souffle


And we're back!!! After months of no kitchen, we are officially back in business. Living a paleo lifestyle means a lot of preparing your own meals, which means a lot of time in the kitchen. If you don't have a space you like to be in, it can make preparing food a chore rather than a pleasure. The new space is open, airy, updated in style, and exactly what we wanted! We couldn't be happier.

BEFORE
(yuck! see the broken cutlery drawer?)

AFTER
(yaaaaaaaaaay!)

I figured the first recipe that I'd share back is a new cooking method I learned from America's Test Kitchen. They have a cool video that shows a brief overview of the cooking method and final product if you want to follow the link.

This is actually inspired by a souffle, but not a souffle. When I think of a souffle, I think of the stereotypical chef cautiously watching an oven and ensuring not a sound is made that will damage the delicate dish, because even a loud noise will deflate this culinary masterpiece. Really, it's just a baked egg dish made with separated eggs that are whipped up and fluffy. The texture of this omelette is what makes it unique as it will be light and airy inside.

Those of you transitioning into Paleo are probably eating a ton of eggs for breakfast for lack of any other ideas. (I know, we've all been there.) This omelette is certainly not the easiest way to make an omelette, but it's unique enough to give you a break from the regular rigmarole and also impressive if you're hosting a brunch for guests.

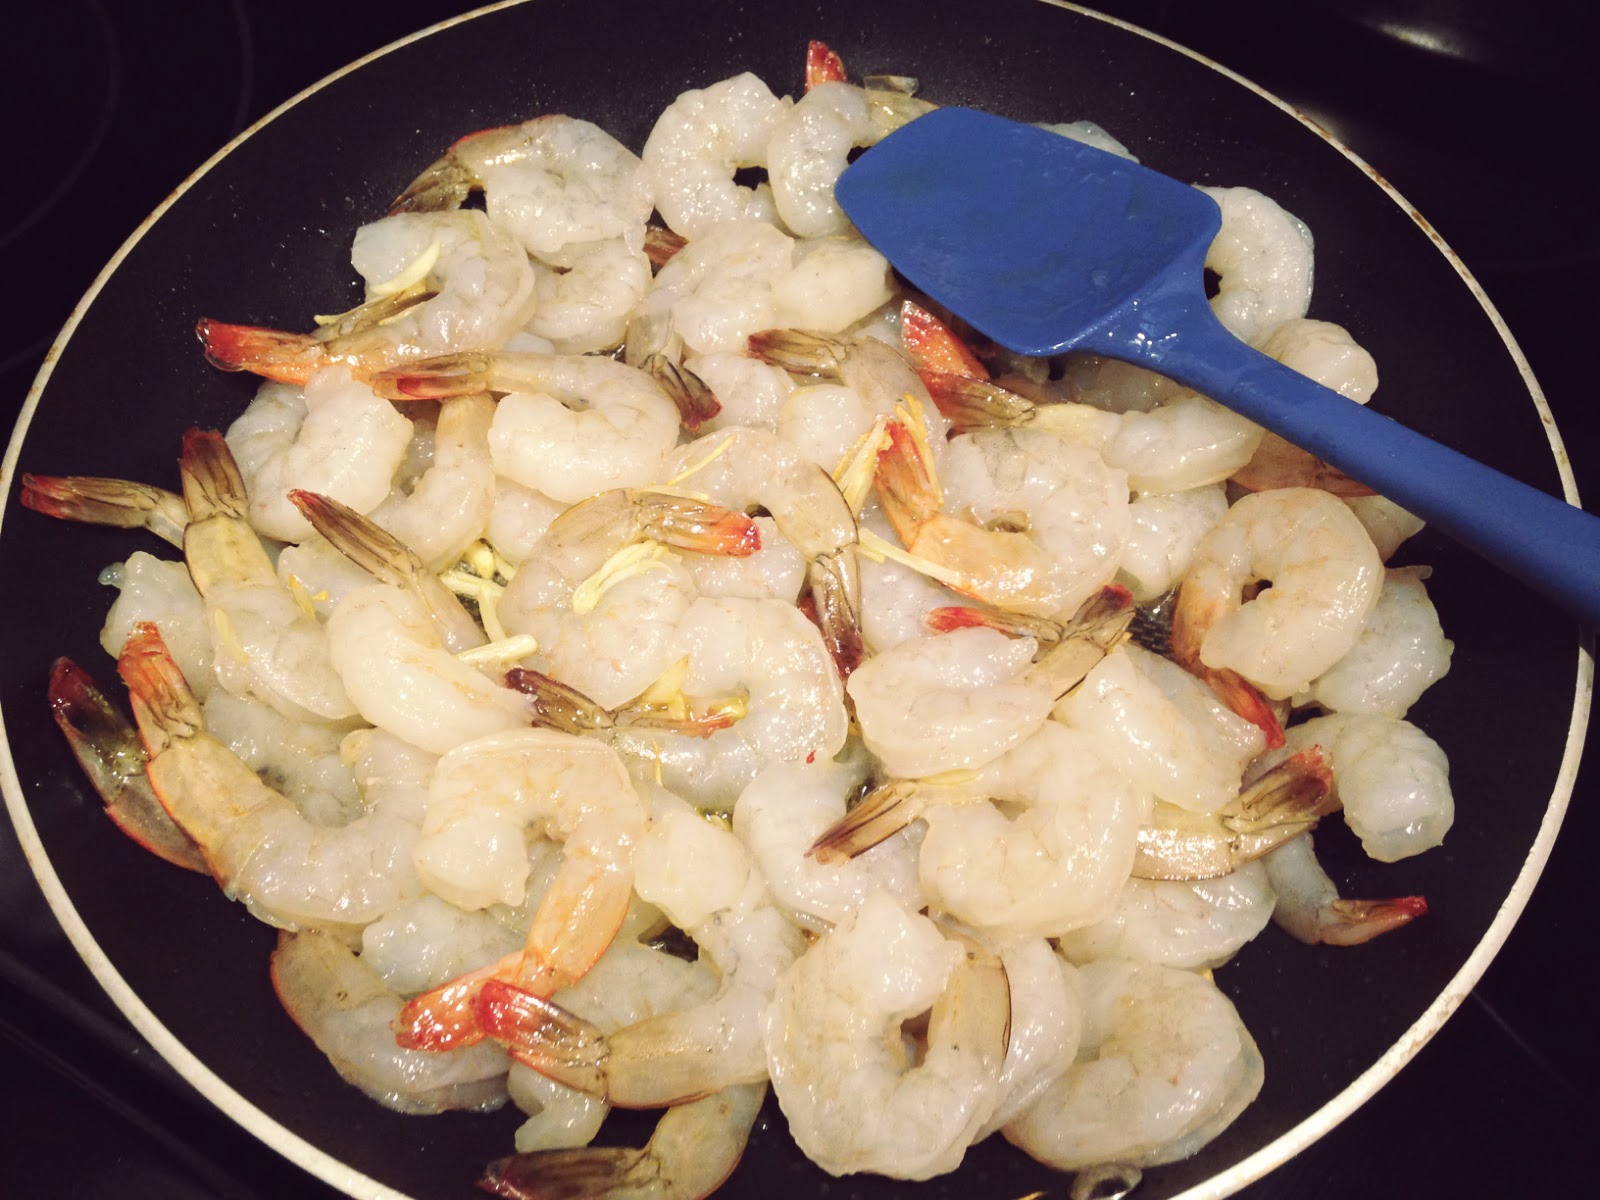
I made my omelette with mushrooms and shallots flavored with lemon and thyme, but don't be afraid to switch it up a bit once you feel confident in the method.

Ingredients

  • Extra virgin olive oil
  • 1 shallot, thinly sliced
  • 4-6 oz chopped mushrooms (I used a mixture of baby bella, shiitake, and oyster - but you pick!)
  • Salt and pepper
  • 1-2 tsp lemon juice (depending on how much you like the taste of lemon)
  • Fresh thyme (a few sprigs) - or dried if need be
  • 4 eggs, separated
  • Clarified butter (or grapeseed oil if you don't do butter)

  1. Preheat oven to 375F
  2. Prepare your vegetables by slicing your shallot thin and cleaning and chopping your mushrooms
  3. Heat a large oven-safe skillet over medium-high heat and add about a teaspoon of olive oil
  4. Saute the shallots once the pan is hot until they are turning translucent, then add the mushrooms and a pinch of salt and pepper
  5. Saute the 'shrooms until browned and then add in the lemon juice and thyme; stir to combine
  6. Remove the mixture from the pan to a bowl off to the side. Wipe out the pan with a paper towel and prepare for the next phase.
  7. Separate your eggs - meaning the yolks from the white. Put the whites in a clean large mixing bowl and the yolks in a smaller bowl. If you don't feel confident in this, try to separate each egg individually over another bowl, that way if a yolk accidentally breaks and falls in, you won't ruin all the work you've already done. You can't have any yolk in your egg whites or you'll have to start over.
    • Here's a video tutorial by Lindsay Ann Bakes for 3 methods for separating eggs if you're unsure how to do this.
  8. To your bowl of yolks, add 1 tsp salt and about 1 Tbsp melted clarified butter (or grapeseed oil) and beat with a fork until mixed well.
  9. Whip the egg whites until stiff peaks just begin to form. Now for you novice chefs out there, this may be your first time working with whipped egg whites, but don't fear! It's easier than you think. 
    • You'll need to ensure everything touching your egg whites (bowl, beaters or whisk) are completely clean and that no egg yolk gets into them before we're ready to combine. 
    • Make sure you've got them in a large bowl, because essentially you're whipping in a bunch of air that's going to cause your whites to puff up over 200% of what they are now.
    • We're going to whip to "stiff peaks" (get your minds out of the gutter). Then you're going to "fold in" your yolk mixture. 
    • If you're new to whipping and folding, check out this video by Culinary Institute of America that shows you how to do both. It's worth a watch.
    • Note, I used an electric hand mixer; I'm not trying to be a hero.
    • Some people like to mix in a bit of cream of tartar to help their whites hold the shape, but I never keep this in my kitchen and still get it to work.
  10. Once your whites are just beginning to form stiff peaks, fold in your egg yolk mixture. Do this very gently and just enough until the colors completely combine. If you over-mix, all the air will come out of your egg whites and the mixture will begin to get liquidy. If this starts to happen, just stop mixing and hope for the best while baking. Or start over with your eggs if it means that much to you to get it perfect.
  11. Melt 1 Tbsp clarified butter (or grapeseed oil) in a skillet on medium heat and rotate your pan to ensure the melted butter coats the surface well to prevent your omelette from sticking. 
  12. Spread the egg mixture evenly into the pan with a spatula and turn off the heat. 
  13. Spread your mushroom mixture along the top of the eggs and pat in lightly.
  14. Bake for 5-10 minutes until the center of the omelette springs back when pressed lightly. If you feel the omelette squishing, like some of the air pockets inside are popping, then it needs more time to bake.
  15. Slide the omelette carefully out of the pan and let rest for 30 seconds before portioning and cutting.


I start whipping at a lower speed until the whites become "frothy".
See how they are bubbling and getting shiny and white?

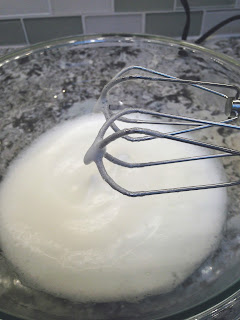
After getting frothy, I up the mixing speed to high and whip until stiff
peaks form. You can see those peaks hanging off the edge of the beater.
See how much the mixture grew in size!

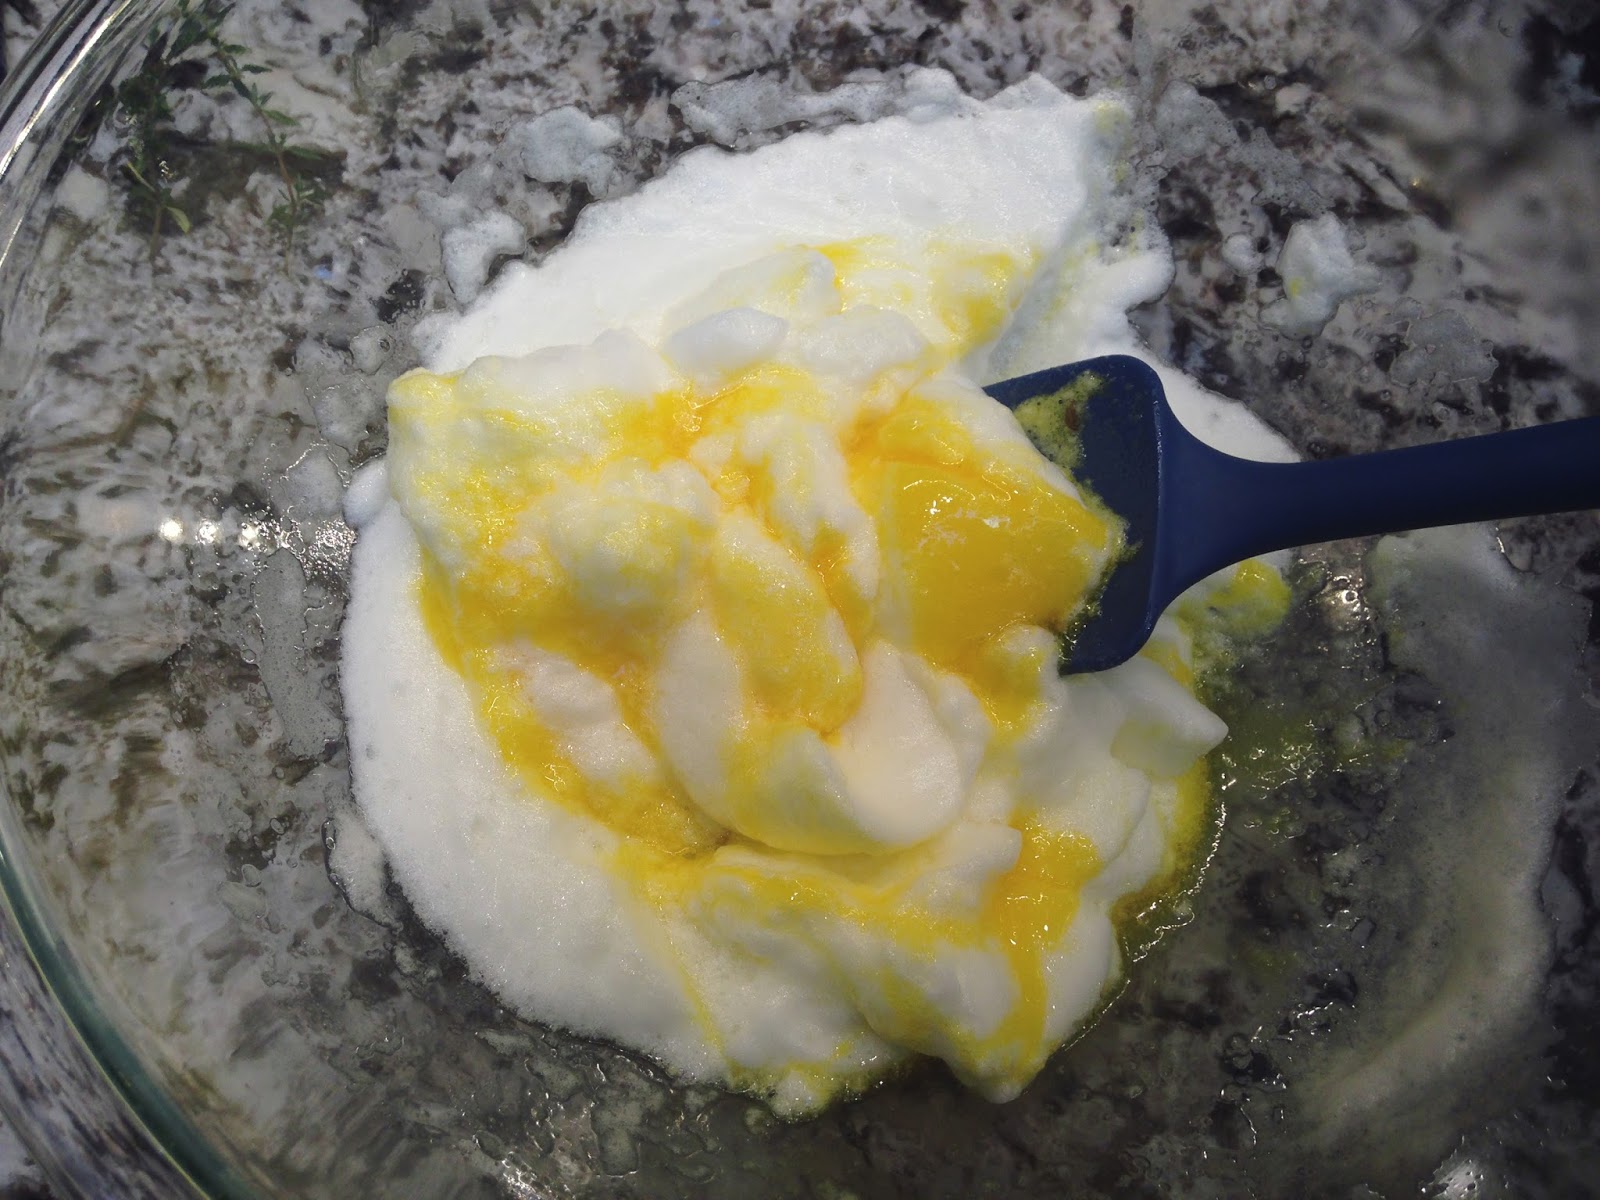
Don't forget to beat the salt and butter into the yolks before
you mix them in with your puffy whites.

Don't over-mix or your eggs will turn to liquid.
Use the folding method with delicate ingredients.

Boom. Still fluffy.


See the fluffy texture? Success!


Friday, September 18, 2015

Send in the Mmmm's

It's been a while since I've made a post, and I'm real sorry about that, but you'll understand once you see this...


Yup, my kitchen. Well, the whole floor including living room and dining room - but basically I haven't cooked in over a month. I made a real valiant effort in the first week to do some grilling, but prepping food and cleaning up in your bathroom gets old real fast.

The project has definitely advanced further along since I snapped this photo, but I still don't have a stove or dishwasher hooked up, so no cooking for me.

I thought I'd share this cool article from Buzzfeed about Paleo, though:
http://www.buzzfeed.com/christinebyrne/how-to-go-paleo#.ieAkGq5YB

Promise I'll be back soon - and fall recipes are my favorite!

Monday, July 20, 2015

Frozen Fruit Bars


The weather here has been what some of the more vulgar among us refer to as HOT AS BALLS! Making frozen treats is one of my favorite things to do to cool off and these Frozen Fruit Bars are no exception. This one is super-simple, incredibly healthy, and refreshing!

You can use any combination of fruits/juices but for this recipe I used strawberries, blueberries, and kiwis along with organic coconut water. Any fruits could work - peaches, bananas, pineapple, etc. Instead of coconut water, you could also use not-from-concentrate orange juice, pineapple juice, etc. (provided there is no added sweetener). You could even throw in some fresh herbs like mint. The possibilities are limitless!

The quantities will vary depending on how many bars you plan to make and how large the mold is. My mold has 6 slots. I bought 2 kiwis and 2 one pound clamshells each of strawberries and blueberries. I used both kiwis, but less than half the blueberries and strawberries.

Ingredients

  • Strawberries
  • Blueberries
  • Kiwis
  • Organic Coconut Water
  1. Wash the berries, peel and slice the kiwi and cut strawberries into slices.
  2. Drop the fruit into your popsicle mold and tamp it down lightly with a spoon or your fingers. (I like alternating the fruit to mix up the layers.) It's important that you leave at least a little bit of space between your fruit pieces so the coconut water can bond it all together, but not so much that your bar is all water and not much fruit. That's why I like blueberries, because they work well leaving teeny air pockets.
  3. Once your mold is filled, pour in the coconut water leaving a little space before you reach the top for overflow. 
  4. Insert your sticks to the mold and freeze. (I checked mine after about 7-8 hours and they were ready.)
Note: If you don't have a mold, you can freeze the fruit in dixie cups. Cover the top with foil and insert a wood craft stick prior to freezing.


Sunday, June 7, 2015

Strawberry Rocket Salad


I always look forward to summer for the explosion of fresh garden fruits and veggies. It's no fun buying ingredients in their off-season, so I tend to wait until the warmer weather before purchasing berries and the like. And oh these honeys were worth the wait!

One of my favorite lettuce leaves is arugula, also known as "rocket". It's in the same family as mustard greens and has a nice peppery flavor. I love pairing it with sweet ingredients like strawberries, cranberries, and almonds and a simple dressing of lemon and olive oil for a summer hit!

Ingredients

  • Fresh washed baby arugula (rocket!)
  • Extra virgin olive oil
  • Fresh lemon juice
  • Salt and pepper, to taste
  • Strawberries, hulled and sliced
  • Sliced almonds
  • Dried cranberries (juice-sweetened of course, no processed sugars added!)
  1. Season your lettuce before adding in the chunky bits. Depending on how much salad you want to make, you should adjust the amount of oil, lemon, and salt/pepper to taste.
  2. Toss your seasoned lettuce and now add in the chunky bits! Toss in the strawberries, almonds, and cranberries and there you have it!
Note: Want to turn this into an entree salad? Add some grilled chicken. Boom!


Summer berries for the win!

I find it's easier to toss lettuce by putting in all the seasonings before adding in the rest.


If you can't find cranberries seasoned with fruit juice instead of processed sugars
like this one from Made in Nature, you can substitute for dried currants or raisins.

Ahhh... freshness 

Saturday, May 16, 2015

Shrimp Scampi


This is a great meal that's perfect for summer when we have to be wary of heating up the house with the oven. And shrimp cooks so quickly that this whole meal can be on the table in no time - with only one pan to clean!!!

Ingredients
  • 2 tablespoon almond flour or almond meal (if you have some Italian Seasoned "Bread" Crumbs pre-pared - use those!)
  • 1 teaspoon extra virgin olive oil + 1 Tbsp + 1 Tbsp
  • 1 Tbsp clarified butter (if you don't use butter, substitute with more olive oil or grapeseed oil)
  • 1 lb large shrimp (cleaned, peeled and de-veined)
  • 2 Tbsp clarified butter (or olive oil for dairy-free)
  • kosher salt and fresh ground black pepper
  • 4 cloves garlic, slivered
  • 1 lemon; juiced
  • 2 tsp finely chopped fresh parsley
  • 2 10oz bags baby spinach
  1. Heat your almond flour in a large non-stick frying pan on medium high heat and drizzle with the 1 tsp of olive oil. The goal is to toast the almond flour into browned crumbs. The oil will help them stick together a bit. Remove from the heat when done and place in a small bowl off to the side.
  2. Place your frying pan back on the stove on medium high heat and add your 1 Tbsp of oil and 1 Tbsp of butter (or more oil). When the pan is warm enough, add in your garlic slivers and saute for 30 seconds or until fragrant. Don't brown your garlic just yet because it still has longer to go in the pan.
  3. Add the shrimp to your pan (make sure you dried them as best you can before tossing them in) and saute until just cooked through. Stir periodically to ensure even cooking. They'll take on a light pink color when done. You know you overcooked your shrimp if they curl into a super tight ring. No bueno.
  4. Sprinkle with salt and pepper to taste, and add the parsley and lemon juice to the pan. Stir well before removing the shrimp from the heat to a bowl off to the side.
  5. Return your pan to the heat and add the remaining 1 Tbsp oil. Add your spinach to the pan and saute a few minutes until just wilted. Stir occasionally to ensure the leaves on top cook evenly with the leaves on the bottom. When done, drain excess liquid from the pan.
  6. Plate by layering a helping of spinach and arrange your shrimp on top. You can spoon on some of the butter/oil/lemon juices from the shrimp bowl and then sprinkle with the toasted almond flour crumbs.
Toasting that almond flour into crumbs

Nothing like fresh ingredients!

About 30 seconds on the garlic is all you need.
If you fry your garlic for too long, it will get a burnt metallic taste.

Toss in them scrimps!

Careful not to overcook your shrimp or they'll become tough and chewy!


You may be questioning why so much spinach, well...

...spinach sure does shrink!

Plate by layering in a helping of spinach and arranging your shrimp on top;
sprinkle with your toasted almond flour crumbs and serve!

Yum!