Monday, April 30, 2012

Lemony Mint Chicken


I absolutely love the combination of mint and lemon. This dish pairs well over cauliflower rice and can be on your table in about 15-20 minutes. If you are like me and try to do a lot of food prep ahead of time, you can go ahead and cut the chicken and keep it in the fridge with the crushed garlic in a zipper bag until you are ready to make this meal.

Ingredients:

  • 1 pack chicken breast tenders, cut into chunks
  • 3 cloves garlic, crushed
  • 1/4 cup coconut flour (plus more if needed)
  • clarified butter (or coconut or olive oil if you don't do dairy)
  • 1/4 cup fresh lemon juice
  • 1/2 cup torn fresh mint leaves

1. In a bowl or large zipper baggie, mix together chicken pieces and garlic, then toss with flour to coat. Shake off any excess flour.

2. Heat a few tablespoons of butter in a large skillet over medium-high heat. Add the chicken pieces; saute until nice and brown. (Bonus points if you get some of them to crisp up a bit.) You may have to add more butter as the coconut flour absorbs a lot of it. You don't want the pan to dry out and burn your chicken.

3. Add the mint leaves and lemon juice. Cover and steam for about 5 minutes; until chicken is cooked through yet still moist.

mmmm... garlic

see how easily the butter is absorbed? your chicken doesn't have to swim in it, but keep adding enough so it won't burn

brown, but not brown enough... don't be hasty!

ah, now that's the crispy brown we're looking for!

don't overcook or your chicken will get tough

Sunday, April 29, 2012

Portable Lunches

Everyday Paleo did a fantastic post on packing paleo-friendly school lunches for kids so I thought why not share my own ideas as well? Here is the link to their original post.

The folks at Everyday Paleo use these metal lunch boxes by Planet Box which are a bit costly, but seem well worth it. I don't have kids [yet :)], but sometimes pack lunches for myself using the BPA-free Bento-style boxes from Laptop Lunches. I purchased different inner containers so I don't have to wash them every single day to reuse them. Note that the portion size is good for someone like me who eats a standard-sized lunch, or a school child. Larger adults (e.g. my husband) may find these containers too small for their larger appetites.

I got really interested in Japanese Bento box culture a few years back which prompted me to purchase this set for myself. Some Japanese parents get really creative in how they arrange their children's lunches, even forming some of the food into shapes and characters. They're not just for kids, though. Many people make it a form of art and attempt to put together elaborate lunches to impress others. Unforunately, their recipes usually have a lot of rice and other non-Paleo ingredients, but it's still fun to look at the photos and get ideas of your own. Here is an interesting link to read up more on packing Japanese Bento boxes.

Here is an example of an elaborate Japanese bento:


Here are some of my own actual lunches I've packed using my trusty Bento box. It was just for me so I didn't feel a need to make little baby chicks or scenes of trains. If you store the box in an insulated bag with an ice pack, the box will keep for several hours and nothing inside requires heating in a microwave (although you could heat something up if you had access to one).

chicken salad lettuce wraps (homemade mayo), baby carrots, mango slices
green salad with hard boiled eggs and mango slices
tuna salad lettuce wraps (homemade mayo) with guacamole-stuffed tomato and kiwi slices
steak salad with broccoli florets and sliced kiwi
pesto chicken lettuce wraps with baby carrots, celery sticks and kiwi slices

Classic Chicken Soup


I learned from an early age how to make chicken soup, but over the years I adapted the family recipe to my own taste and spiced it up with more hearty vegetables and delicious herbs. I've found that chicken soup is a great way to clean your fridge out of vegetables that may be lingering in the drawer. The basic staple veggies are carrot, onion, and celery. Other vegetables that may make an appearance are broccoli, zucchini, cauliflower rice, escarole, spinach, etc. Feel free to get creative and experiment! Below is the recipe as I threw it together the other night:

Ingredients
  • 1 package boneless, skinless chicken thighs
  •  1 medium onion, halved and sliced thick
  • 2-3 sundried tomatoes, chopped (these are just for a little extra taste for the broth, so don't overdo it)
  • 8 - 10 cups low sodium chicken broth or stock
  • salt and pepper to taste
  • 2-3 handfuls of baby carrots
  • 3-4 sticks of celery, sliced thick (don't discard the leafy tops! chop those up and add them as well)
  • 1 large zucchini, halved and sliced 1 inch thick (this was my "extra" veggie I added to my soup this time around outside the staple ingredients)
  • assorted herbs (a few sprigs fresh, or 1 tsp dried) of thyme, rosemary, and parsley

  1. Begin by adding the chicken thighs, onion, and sundried tomato to a large stock pot or dutch oven and cover it with chicken stock. 
  2. Add a few pinches of salt and fresh ground pepper to taste and crank the heat up to high to bring the pot to a boil.
  3. When the pot boils, lower the heat to simmer until the onions are translucent and the chicken is cooked through (about 10-15 min).
  4. Add all your herbs and veggies to the pot (except if you are doing leafy greens like escarole or spinach - those will wait until the end).
  5. Simmer another 10 minutes or so more until vegetables are soft. I usually do what I call the "carrot test". I maneuver a baby carrot to the side of the pot and see if I can easily squish it with my wooden spoon. If I can't, the veggies aren't soft enough and I know I need to cook it longer. If the carrot "squishes" then my soup is ready to come off the stove. If I am adding in leafy greens, I do it at that point and cook for another minute or so until the greens have wilted. 
  6. Take a large spoon and remove the chicken thighs from the pot (they should all still be whole for the most part) and put them in a bowl off to the side. One by one, use a knife and fork to shred the chicken and add it back to the pot. Once this is done, then the soup is ready!

Tips for variations:

  1. Pulse cauliflower florets in a food processor until it has a rice-like consistency and saute it in a nonstick pan with a little oil until just soft. This can be added to your soup before serving to mimic rice.
  2. Julienne some zucchini or summer squash and saute them in a frying pan with a little oil until aldente and add them to the soup before serving to mimic noodles.
  3. Chop up some delicious leafy greens like a head of escarole or spinach and add it to the pot for the last minute of cooking.
  4. If you eat cheese, a little grated fresh parmigiano reggiano cheese is delicious sprinkled in the soup before serving. You could also save the rind of the cheese and simmer it in the pot beginning in step 1. Just be sure you discard the rind when the soup is done cooking.


Saturday, April 28, 2012

Clarified Butter


About a month ago, I decided to add butter into my diet. I just can't find a good reason why I wouldn't eat it. The only acceptable form for me would be organic, grassfed, clarified butter, though. If you want to read into it, the Whole 9 discusses all the points in easy to understand terms in their Butter Manifesto. You can clarify butter at home on your stove easily.

There are two basic advantages to clarified butter over regular butter - health advantages and cooking advantages. For health reasons, buying grassfed/organic will eliminate toxins transferred from the animal to you through their crappy diet and living conditions. Clarifying the butter removes all the milk solids (aka milk proteins) which contribute to conditions like cardiovascular disease, cancer and autoimmune diseases, and produce other inflammation-related symptoms.

The cooking benefit of clarified butter is that it is very stable, and can be kept for long periods of time without going rancid. Clarified butter is also great for sauteing because it doesn't burn as easily as ordinary butter, so you can use it for cooking at hotter temperatures.

Here is the method for clarifying your butter:

  1. Ensure your butter is UNSALTED.
  2. Toss a bunch of sticks in a stock pot on low heat. As the butter melts and begins heating, the milk solids will rise to the top (see that white foam) and the water will cook off.
  3. As the milk solids collect along the surface of the butter, skim them off with a ladle. Do so until the butter becomes clear, almost like olive or grapeseed oil.
  4. Transfer melted butter to a glass (or otherwise sturdy and airtight) container by pouring it through a few layers of cheese cloth to catch any last little milk solids you may have missed. (That part with the cheesecloth is optional, but I recommend doing it.)
  5. Let the liquid cool, seal it up tight with a lid and put it in the fridge where it will harden up. Discard all the yucky milk solids.
I picked up this box of organic butter at Trader Joe's.

4 sticks of butter melting on low heat.. see how cloudy it is to start

milk solids are rising to the top

skim off milk solids with a ladle and put in a bowl off to the side
(discard these afterwards)

 
the butter is nice and clear now with the milk solids removed

as an extra measure, strain the butter through a few layers of cheesecloth

let cool before storing in the fridge in an airtight glass container

mmmm... butter!

Tuesday, April 17, 2012

Egg Muffins

You can only eat so many hard boiled eggs before you get bored. Egg muffins are a great portable breakfast idea. Seems like every Paleo blog has an egg muffin recipe, so I guess I should jump on the bandwagon, too. I realize the name "egg muffins" may be a bit misleading. These aren't like an egg mcmuffin, or any kind of bread-like muffin. It's more like mini frittatas with veggies in them. You'll see.

You can put anything you want in these muffins - they're so versatile. Just make sure you pre-cook any meat (e.g.bacon or sausage) and saute veggies in a pan until soft so you don't wind up with crunchy veggies in your eggs.
To balance out the flavors, I recommend you stick to the following mix of ingredients:
1. A nice salty meat (like bacon, sausage, or prosciutto)
2. Some sort of leafy green (like spinach, collard or kale)
3. Something flavorful with kick (red/yellow onion, shallot, or garlic, even hot peppers)
4. Something sweet (like tomato or sundried tomato)
5. Other good additions are mushrooms, olives, peppers, broccoli, ham, etc.

Unfortunately, the day I decided to whip these up my vegetable drawer was pretty bare so I scraped together a pretty eclectic mix of vegetables. In place of the usual leafy greens I keep around I wound up using beet greens off the tops of a few fresh beets I had laying in the fridge. Believe it or not, beet greens can be delicious and cooked quite similarly to spinach and kale. If you use beets, don't waste these nutritious tops! I was also completely out of fresh tomatoes but luckily had a container of sundried collecting dust in the back of the fridge. You'd be surprised what you can concoct from the crap laying around in your fridge!

So my muffin pan has 6 muffin cups; some pans have 12. You want to use 1 egg per muffin cup. If you don't want to fill the entire pan, make sure you fill any empty cups with water before putting it in the oven so it heats evenly. For the purpose of this recipe, I made 6 egg muffins, hence I used 6 eggs.

Here is my exact recipe, but do experiment on your own. I'll probably never make these the same way twice.


Ingredients:
  • 3 slices of bacon, cooked crisp and diced
  • 1/4 - 1/2 a red onion, finely diced
  • 2-3 sundried tomatoes, finely diced
  • beet greens from 3 fresh beets, stems removed, leaves chopped
  • 6 eggs
  • salt and fresh ground pepper
  • red pepper flakes
  1. Preheat oven to 350F.
  2. Cook bacon in a non-stick frying pan. While the bacon is frying, prepare all your vegetables.
  3. After you pull the bacon out of the pan, dice it into small pieces and put it off to the side. Reserve a tablespoon or two of the bacon grease in the pan and saute the hardier vegetables, excluding your leafy greens, on medium heat until soft. Onions should be translucent, do not caramelize them. Add your chopped leafy greens to the pan and cook another minute until wilted.
  4. Beat the eggs in a large mixing bowl. Mix the veggies and bacon into the beaten egg. Sprinkle in a few pinches of salt, ground pepper, and a few shakes of red pepper flakes for a hint of spice.
  5. Spray muffin pan with olive oil, or use paper muffin cups to line the pan. Use a spoon to evenly distribute the egg mixture into the cups. If you did it right, you'll have about 1/4" - 1/2" space between the mixture and the top of the muffin cup. Bake at 350F for about 20 minutes or desired doneness.
  6. You can eat these right away or store in a container or zipper bag in the fridge for consumption during the week. They travel very well!

Tips for Variations

1. Try using Adobo or Garlic Salt as your seasoning

2. You don't only have to use fresh raw ingredients, feel free to clean your fridge out of leftovers (e.g. leftover roast kale or sauteed spinach, sausage meat, etc.). Just add already-cooked food to your frying pan for the last minute or so of cooking to heat it back up. (Make sure you chop it up small first!)

3. If you do dairy, get crazy and sprinkle a little shredded grassfed, organic cheese on top.

4. Beat a few tablespoons of coconut milk into your eggs to add some more fat (for those of you trying to gain) and puff your eggs up.


Orange Vegetable Mash

My wonderful mother in law had us over for dinner a few months back and served this amazing side dish. It's a great alternative to the overly-sweet sweet potato mash usually served on holidays like Thanksgiving (you know the ones with the little marshmallows on top). It's actually got a very rich flavor blend because of the onion and garlic, and is hardly sweet at all. Of course, when I went home I had to recreate my own version.

Take care when cutting your vegetables that you try to make the pieces about the same size so they roast evenly. Otherwise, the smaller pieces will begin to burn while larger pieces remain raw and hard.

Ingredients (amounts can probably vary as to what you have available)
  • 1 medium-sized butternut squash, peeled, seeded and cut in chunks
  • 2 small sweet potatoes, peeled and cut in chunks
  • 1 carrot, peeled and cut in 2" or 3" pieces (or use a handful of baby carrots)
  • 3 cloves garlic, peeled
  • 1 medium-sized onion, peeled and cut in eighths
  • Extra Virgin Olive Oil (EVOO)
  • Salt and black pepper, to taste
  • Herbs de Provence, to taste (or a select mix of your favorite herbs)
  1. Arrange prepared veggies on a large greased baking sheet. (Do your best to get them all to fit.) Drizzle with oil and sprinkle with salt, fresh ground pepper, and the herbs.
  2. Bake at 400F until veggies are roasted and soft (probably anywhere from 30-50min depending on how small you cut your veggies and how full the baking sheet is).
  3. Pulse in a food processor until nicely blended. (taste and see if you need to add any more salt or herbs)
  4. Serve with a bit of fresh cracked pepper on top for presentation.

Note the vegetables are fairly uniform in size

mmmm... nice and roasted!

pulse pulse pulse!

Recipe Test - Italian Sausage Eggplant Strata


This recipe is another home run from the cookbook Well Fed by Melissa Joulwan. It got two thumbs way up from my husband who ate it the next day for breakfast and lunch. And then had it that same day as a snack. Basically he kept eating it the entire day. I have to agree, it is pretty darn good. The writer advises that it tastes better after spending a few days in the fridge so I made the pan on a Sunday night and we ate it during the week. It kept very well and was DEE-LISH.

Note that you need to prepare a simple Italian sausage spice mix for use in this meal. You won't need all of it, so save the rest in a little jar or spice container for future use. Also, I found that by the time I got to the top layer of the strata, I was running out of tomato mixture. Others who made the recipe after me had the same problem as well, so what I've done here is increased the ingredients for the tomato mixture to proportion it a bit better.

Italian Sausage Seasoning

Ingredients
  • 4 tsp dried parsley
  • 1 Tbsp dried Italian herbs (I didn't have one bottle all mixed together so I did basil, oregano, and a little sage.)
  • 2 tsp ground black pepper
  • 2 tsp garlic powder
  • 2 tsp paprika
  • 4 tsp salt
  • 1 tsp crushed red pepper flakes
  • 1 1/2 tsp fennel seed (optional) - you should use this if you have it, though, it really gives the meat that sausagey taste
In a medium bowl, crush the dried parsley and Italian herbs with your fingers or a fork to release their flavor. Add the black pepper, garlic powder, paprika, salt, red pepper flakes, and fennel seed. Mix with a fork and transfer to an airtight container for storage.

Italian Sausage and Eggplant Strata

Ingredients
  • 3 1/2 pounds globe eggplants (about 2-3)
  • 2 Tbsp coconut oil, melted
  • 2 pounds ground pork
  • 3 Tbsp Italian Sausage Seasoning (recipe above)
  • 1 Tbsp coconut oil
  • 4 cloves garlic, minced (about 4 tsp)
  • 2 (28 oz) can diced fire-roasted tomatoes
  • 8 large basil leaves, slivered (about 2 Tbsp)
  • 6 eggs
  • salt and black pepper, to taste
  • 2 tsp extra virgin olive oil
1. Preheat the oven to 400F. Cover two baking sheets with parchment paper or aluminum foil and brush a 13x9 baking dish with some of the melted coconut oil.

2. Slice the eggplant into rounds about 1/2 inch thick and place on the baking sheets. (I used the smaller Italian eggplants the first time I made this which is why the pictures below may look a little different.) Brush the eggplant with the remaining melted coconut oil, and sprinkle with salt and pepper. Bake for 20 minutes, and then remove from the oven and allow to cool. Reduce the oven temp to 350F for the next stage of baking.

3. While the eggplant is roasting, crumble the ground pork into a large mixing bowl with your hands, then add the Italian Sausage Seasoning and knead until well blended.

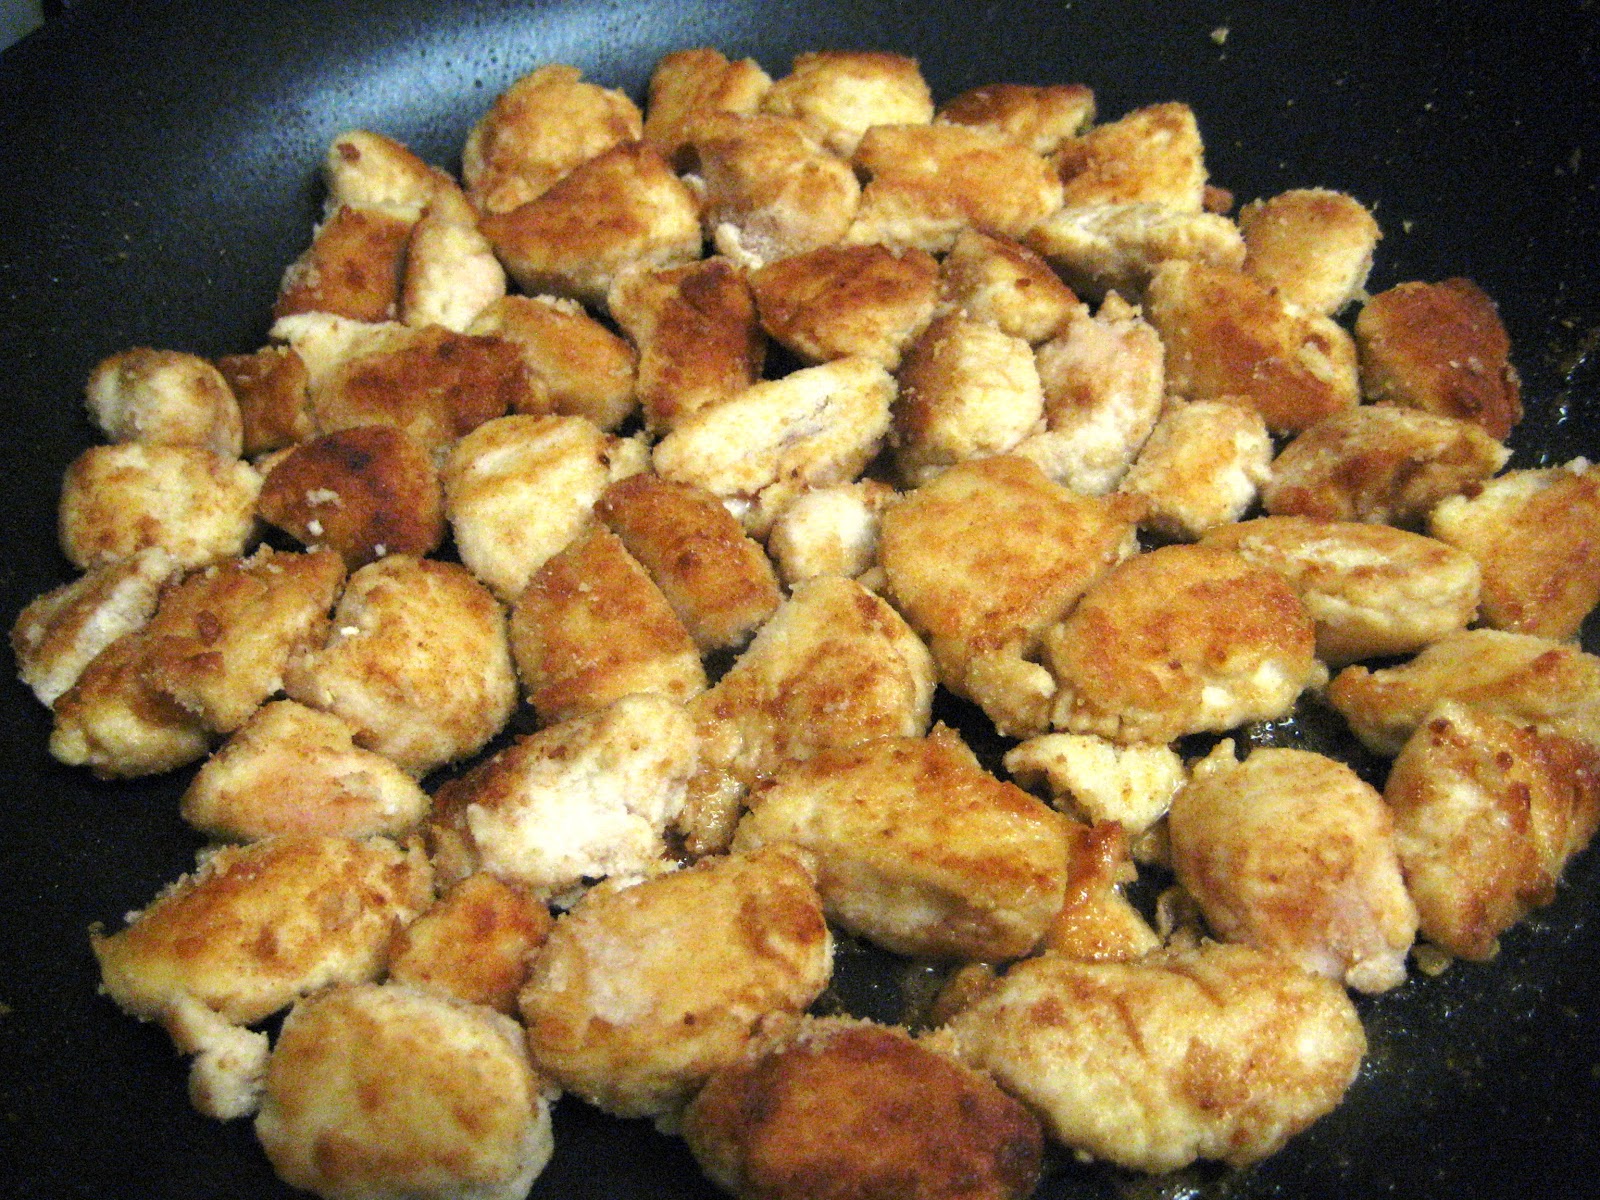
4. Heat a large saute pan over medium-high heat. Crumble the pork into the pan, then break up large chunks using a wooden spoon. Cook until the pork is browned, about 7-10 minutes. Remove meat to a bowl and return the pan to the stove.

5. Reduce the heat to medium, then add 1 Tbsp coconut oil and the garlic to the pan. Cook until the garlic is fragrant, about 30 seconds, then add the tomatoes and 1 Tbsp of the basil. Stir to combine, increase heat, and bring to a boil. Reduce heat to low and simmer until slightly thickened, about 10 minutes. Season with salt and pepper to taste. Remove from heat and allow to cool to room temperature.

6. When the tomato sauce is cool, scramble the eggs in a small bowl, then blend them into the tomato sauce with a wooden spoon. (This will look really gross, but do it anyway.)

7. To assemble the strata, place a single layer of eggplant in the bottom of the greased 13x9 inch pan. Sprinkle half of the cooked meat on top of the eggplant, then top with a third of the sauce. Create another layer of eggplant, top with the remainder of the meat the second third of the sauce. Build your final layer with eggplant and spread the remaining sauce evenly over top.

8. Place the pan in the center of the oven and bake for 30 minutes. Remove the pan from the oven and let it rest for at least 30 minutes before slicing or eating. Before serving, lightly brush the top of the strata with olive oil, then sprinkle with the rest of the basil. (I skipped the step with the olive oil and the basil and wrapped the pan tightly with plastic wrap and kept it in the fridge a few days. When we were ready to eat it, I cut out a few squares and topped them with basil and heated them up in the microwave. You could also heat it back up in the oven or toaster oven.)

I bought these little spice pots in a pack of three in Homegoods.
They are the perfect size to hold the remainder of this spice mix.

browned meat, cooling off to the side

mmmm fire roasted tomatoes!

yucky raw egg mixture
 
Build the strata! Layer one: eggplant

Layer 2: Meat; Layer 3: Tomato mixture
 
3 more layers of eggplant/meat/tomatoes, top off with
more eggplant and the rest of the tomatoes


as you can see, I didn't have enough tomato mixture to cover
the entire top which is why I've increased those ingredients


Monday, April 16, 2012

Fruit Sorbet

Today I did some kitchen spring cleaning - primarily on the freezer - and had some frozen fruit to get rid of. For this sorbet, I used a bag of frozen mangoes, but really any frozen fruit can be subbed into this recipe for unlimited different flavors. You will need some kind of ice cream/frozen yogurt machine in addition to a blender or food processor. I have a 2 qt ice cream maker by Cuisinart (seen here). If yours is only 1.5 qt capacity, I recommend you reduce the amounts below by at least a third so it doesn't overflow.

Ingredients
  • 1 16oz bag of frozen fruit (I used mangoes this time, but have also done strawberries in the past)
  • 3 cups water
  • 1/3 cup agave nectar honey
  1. Pour all ingredients into a blender and blend until smooth.
  2. Pour mixture into ice cream maker and process according to machine directions (I usually do about 30 minutes) until sorbet reaches desired consistency.
  3. Sorbet is ready to eat right away, but store extra in an airtight container in the freezer. Put a layer of saran wrap over the layer of sorbet inside the container to prevent icing over.

  4. you can start with frozen fruit like this, or fresh

    slop it all together in the blender

    smooooooth

    this is how full the 2qt ice cream maker became

    the sorbet is done when it's nice and fluffy

    add a layer of saran wrap over leftovers to store
    in an airtight container in the freezer