Sunday, June 30, 2013

Sauteed Cremini Mushrooms with Lemon, Capers, and Garlic

It wasn't until I became an adult that I really started to appreciate mushrooms. As a kid, I would pick them out of whatever meal they were in and isolate them from the rest of my food. My favorite mushrooms nowadays are portobellos (big mushrooms) and baby bellas (smaller relation of the portobello aka cremini or crimini). I've grilled them, broiled them, stuffed them, mixed them in chili and marinara, but not really given them a good saute. I was in an experimenting type of mood and came up with a delicious new way to showcase these bite-sized little fungi.

Ingredients
  • 16oz whole cremini mushrooms, wiped clean with damp paper towels
  • 1 Tbsp grapeseed oil
  • 1 Tbsp clarified butter (can substitute with another Tbsp of grapeseed oil)
  • Juice of half a lemon
  • 2 Tbsp capers, drained
  • 3 cloves garlic, minced
  • 1/4 tsp dried thyme
  • Fresh ground pepper, to taste
  1. Slice the mushrooms in half lengthwise through the stem and cap (any larger mushrooms should be cut in quarters) 
  2. Heat the grapeseed oil and butter on the stove in a pan over medium-high heat until the butter begins to froth.
  3. Add the mushrooms to the pan and saute 5+ minutes until just soft.
  4. Add the remaining ingredients to the pan and saute a few minutes more until flavors combine and mushrooms are fork-tender.
When cleaning my 'shrooms with paper towels, most of that dark skin came off revealing the delicate white meat underneath.

2Tbsp probably feels like a lot of oil/butter, but these little sponges will soak it up.

Prepping my capers and fresh lemon juice.

Adding the rest of the ingredients to the pan.
Ready to enjoy!

Wednesday, June 26, 2013

Pan-Fried Pork Chops

One of the simplest recipes in my repertoire are these delicious, pan-fried pork chops. They're perfect for a quick weeknight meal because they only take minutes to prepare. My favorite part is the flavorful juice that comes seeping out as they cool on a plate fresh from the pan. I like to cut my meat into small pieces and sop those extra juices up with each bite.

Mmmm... juicy
Ingredients
  • 4 boneless center cut pork chops 
  • Garlic powder
  • Salt and fresh ground pepper
  • Smoked paprika (aka bacon spice!)
  • Coconut oil
  1. Season both sides of the pork chops with garlic powder, salt, pepper, and smoked paprika - all to taste.
  2. Heat a tablespoon or two of coconut oil in a pan over high heat (not the highest, but up there).
  3. Fry the chops a few minutes on each side, until only slightly pink or just white when cut open. The outside will get brown and caramelized which is where the delicious flavor comes from, but cooking too long will dry the chops out.
  4. Let sit at least 5 minutes on a plate before serving so those tasty juices can come seeping out. Drizzle any leftover juices on top when serving.
Love that smoked paprika!

Mmmm... caramelized

Juices starting to seep out... the best part!


Saturday, June 22, 2013

Frozen Fudge Bars (Dairy Free)


Yesterday was the summer solstice and I am ready for some steady sunny days! I decided to whip up a batch of frozen fudge bars for what I hoped would be a nice warm weekend. This recipe is a knockoff of Popsicle®'s brand of Fudgsicles® that I used to enjoy when I was a child. Take a look at the ingredients/nutrition facts of Fudgsicles® that are supposedly "no sugar added".
Click to Enlarge


There are at least 25 ingredients on here, and I don't even know what most of them are. I don't really want to ingest microcrystalline cellulose, which is refined wood pulp. They use it as a texturizer, an anti-caking agent, a fat substitute, an emulsifier, an extender, and a bulking agent in food production. [source: wikipedia] So basically, they threw some extra junk in there to get away from giving us actual food.

 
My recipe has four simple ingredients. You will need an ice cream maker for this recipe, unless you want to make them similar to a Popsicle®'s consistency. To make the bar shape you can purchase a mold or use small disposable cups with wood craft sticks.


Ingredients
  • 2 cans full fat coconut milk (about 13.5oz each)
  • 1/2 cup raw honey
  • 2/3 cup unsweetened cocoa powder (check the label to make sure the only ingredient is cocoa!)
  • 1 pinch of salt
  1. In a large bowl, whisk together the coconut milk and honey.
  2. Gradually whisk in the 2/3 cup cocoa powder by dumping in a bit at a time. Cocoa likes to float along the surface of liquids rather than soak it up. Just keep whisking away, though, and eventually it will comply. It will take on the texture, look, and smell of melted ice cream.
  3. Add the pinch of salt and give it one last good whisking.
  4. Dump the mixture into your ice cream machine and process according to your machine's directions. This recipe fills my 2 qt ice cream maker and it takes me 30 minutes.
  5. When done, remove the ice cream to a separate large bowl to prevent it from freezing to the sides of the machine.
  6. With a small spoon, drop the ice cream into your mold. Ensure you tamp down each spoonful thoroughly to avoid air pockets or your bars may break when removing from the mold. Freeze any leftovers in an airtight container (place a layer of plastic wrap flush across the top to prevent frost) to be enjoyed as ice cream.
  7. Place the tops on the mold (or put your craft sticks centered in each cup about 3/4 to the bottom and cover with plastic wrap) and freeze for a minimum of 3 hours.
  8. When ready to enjoy you may have to use a little elbow grease to rock the bars back and forth to release from the mold. 
  9. Enjoy immediately as they will melt!
Note: My mold had 6 bars in it so I had some ice cream left over. I prefer to freeze this recipe into bars because if you have just a tub of ice cream, after you leave it in the freezer long enough it hardens up so much that you have to leave it sitting out to soften up just to eat it. This way it goes right from the freezer to my belly!

Your cocoa powder should only have 1 ingredient.

This does NOT want to be mixed.
 
Like melty ice cream.
 
whirrrrrrrr!

Spoon it in bit by bit. (If you spill any on top, just clean it off with a paper towel prior to putting in the freezer.
Tamp it down well with your spoon to avoid air bubbles.

Seal 'er up and freeze it!

Uh-oh! Didn't do a good job getting rid of that air!

Frozen Fudgy Perfection


Tuesday, June 18, 2013

Avgolemono (Greek Egg Lemon) Soup


Ok, sorry to have to do this, but I'm posting another soup recipe. It's been so snotty out lately in NY with torrential downpours that I've been craving another bowl of warm yummies. There's a Greek restaurant near my house from which my husband and I occasionally break down and order a big container of avgolemono soup. The soup has a slight hint of lemon flavor and a silky amazing brothy base. Most recipes add orzo (little rice-like pasta) and something like corn starch as a thickener. booooo! But avgolemono is a great summer soup because the lemon gives it a bit of a 'cool' sensation, if that makes any sense. And I wants it.

In the spirit of finding a Paleo workaround, I scoured the internets for how to make traditional avgolemono soup and found it wouldn't actually be that difficult to adapt. This recipe requires a technique called "tempering" which is mixing a small amount of a hot ingredient into a cold one. We do this with delicate ingredients like eggs, cream, or chocolate to prevent them from curdling or getting lumpy. It sounds fancy and complicated, but really you just need a whisk and a spoon.

Ingredients
  • 1lb raw boneless chicken breast, diced
  • 3 cloves garlic, smushed with the flat blade of your knife and sliced
  • 1 medium onion, diced
  • 2 cups grated cauliflower (3 cups if you want more "stuff" floating around)
  • 8 cups low-sodium chicken stock
  • 4 eggs
  • 1/2 cup fresh lemon juice (roughly 4 lemons depending on their size)
  • 1 tsp lemon zest
  • 1 - 2 tsp fresh torn parsley leaves
  • Salt and pepper, to taste
  1.  In a large stock pot, combine chicken, garlic, onion, cauliflower and chicken stock and bring to a boil. Immediately reduce the heat and simmer until the chicken is cooked, the onions are translucent, and the cauliflower is of the desired consistency. (Maybe 10 - 15 min?)
  2. While the pot is simmering, in a large bowl lightly whisk the eggs, lemon juice, and lemon zest. Here's a tip to get more juice out of your lemons - roll them on the countertop before you cut them. This will yield more juice when cut and squeezed.
  3. When the chicken and veggies in the pot have reached desired doneness, season with salt and pepper, and add torn parsley leaves.
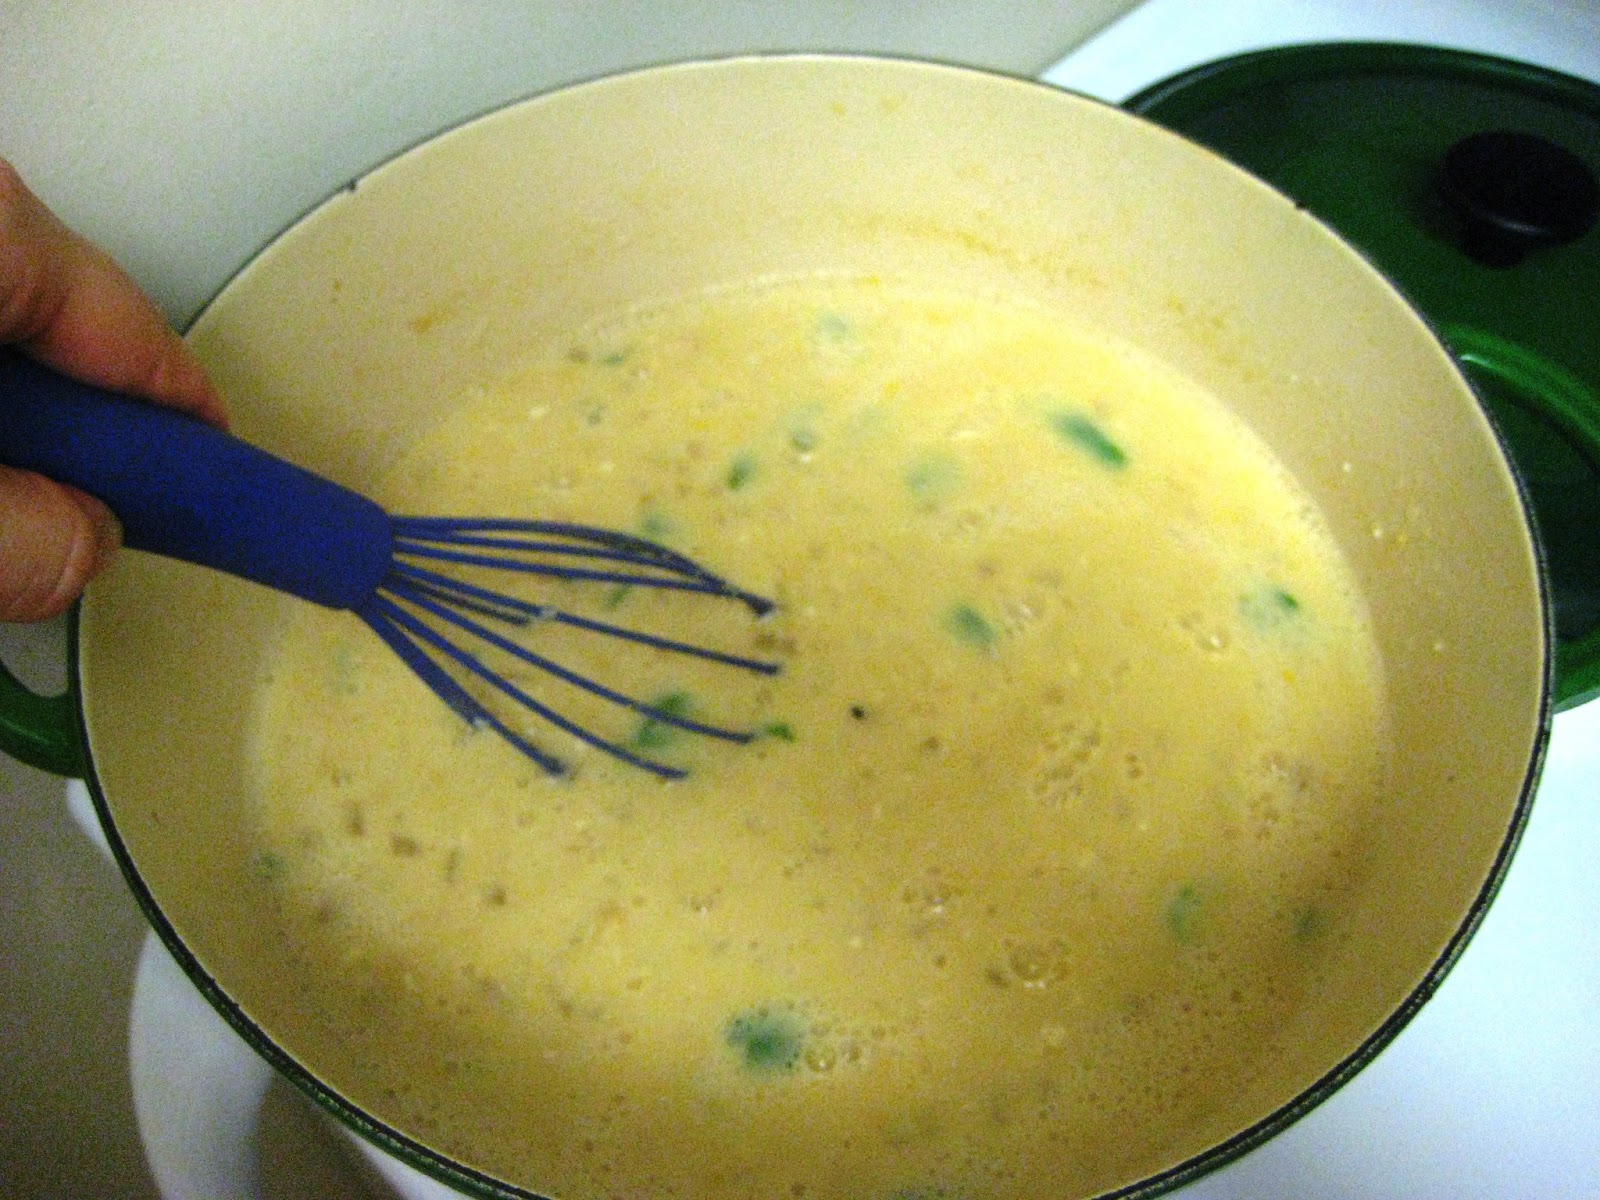
  4. In order to add the egg mixture to the pot without making scrambled eggs, you'll need to temper the mixture. To do this, use a ladle or large spoon and scoop a bit of hot broth from the pot and pour it into the egg mixture while simultaneously whisking the eggs continuously. Do this a few more times until you add in at least a cup of broth, or feel that the temperature of the mixture has evened out to be stable enough to add to your pot. I err on the side of caution and add a LOT of broth.
  5. When the mixture is tempered to your heart's delight, dump it into the pot while whisking the entire soup until thoroughly combined. Now your soup has that delicious silky texture. Immediately turn off the stove and take the pot off the heat. Your soup is ready to serve!
Note: When re-heating this soup do NOT bring it to a boil as you could disturb the eggs. Heat it up gradually until warm.


I used the large holes on my box grater to grate the cauliflower. You could pulse it in the food processor as well to get this consistency if you don't have a grater.


Sorry this picture is so crappy, I didn't have enough hands. This is me tempering the mixture with some of the hot broth.

Whisk away!

Boom! Silky Smooth!
Mmmm... silkyyyy

Sunday, June 2, 2013

How to Dispose of Grease and Oil the Safe Way


We may not always stop to think that when we finish preparing a meal and wash our unused oil or grease down the drain we may actually be causing damage to the environment. Did you know that fats, oils, and greases that are put down the drains accumulate in the sewers and congeal - sometimes causing blockages? Well, when this happens, it reduces the amount of sewage that can be processed and that endangers our fresh water and our beaches. No one wants raw sewage overflowing into rivers and beaches, or worse - our own homes!

Just look at this gross, stopped-up sewer! Kind of reminds you of a clogged artery, no?
And no amount of "grease cutting" dish soap is going to help combat this problem. All that will do is clean your pots and pans and wash the grease down the drain faster.

I wonder how much of this used to be bacon grease?

So what's the bottom line? Don't put your grease down the drain!

But what's the best way to get rid of fats, oils and greases if you can't put them down the kitchen drain or flush them down the toilet? You should send it out with the trash. I don't recommend you pour boiling hot grease into your garbage can, so how can you take that liquid and dispose of it with your solids?

Keep an empty container under the kitchen sink to collect wasted fat, oil, and grease. I save glass jars from coconut oil, capers, pickles - even candles! My mother used to use old coffee cans.


After the oil or grease cools slightly, I pour it directly into the jar and re-seal it. I stay away from plastic as I am impatient and do put warm liquids in there and wouldn't want to melt it. (But really, plastic that is not recyclable is probably the best because it was headed to the landfill anyway.) I also made the mistake one day of not letting it cool enough and CRACK! I busted the glass jar. Thankfully I didn't hurt myself, but that was a close call. Don't make the same mistake that I did.

Let's make sure that mother nature doesn't pay the price for your bacon habit.

Whatever container you use, there should be some absorbent material inside to help soak that oil/grease up so it doesn't remain in liquid form. I typically use paper towels that are left over from cleaning, but other ideas are used coffee grounds, clean kitty litter, newspapers, coffee filters, even dirt from outside. As your grease builds up, just add more absorbent material until your container is full. Then toss it out with your household trash.

Big puddles of oil or grease are pretty obvious no-no's for dumping, but we also need to be wary of salad dressings, Paleo mayo that has passed its prime, oil-based meat gravy or meat drippings, etc. There is also grease residue left in your pan after cooking with oils.When I have some fat residue left in a frying pan, I'll wipe the pan out with a dry paper towel to soak up the grease and put the entire paper towel into the grease jar.

Thanks for helping keep our water supply clean!