Saturday, June 22, 2013

Frozen Fudge Bars (Dairy Free)


Yesterday was the summer solstice and I am ready for some steady sunny days! I decided to whip up a batch of frozen fudge bars for what I hoped would be a nice warm weekend. This recipe is a knockoff of Popsicle®'s brand of Fudgsicles® that I used to enjoy when I was a child. Take a look at the ingredients/nutrition facts of Fudgsicles® that are supposedly "no sugar added".
Click to Enlarge


There are at least 25 ingredients on here, and I don't even know what most of them are. I don't really want to ingest microcrystalline cellulose, which is refined wood pulp. They use it as a texturizer, an anti-caking agent, a fat substitute, an emulsifier, an extender, and a bulking agent in food production. [source: wikipedia] So basically, they threw some extra junk in there to get away from giving us actual food.

 
My recipe has four simple ingredients. You will need an ice cream maker for this recipe, unless you want to make them similar to a Popsicle®'s consistency. To make the bar shape you can purchase a mold or use small disposable cups with wood craft sticks.


Ingredients
  • 2 cans full fat coconut milk (about 13.5oz each)
  • 1/2 cup raw honey
  • 2/3 cup unsweetened cocoa powder (check the label to make sure the only ingredient is cocoa!)
  • 1 pinch of salt
  1. In a large bowl, whisk together the coconut milk and honey.
  2. Gradually whisk in the 2/3 cup cocoa powder by dumping in a bit at a time. Cocoa likes to float along the surface of liquids rather than soak it up. Just keep whisking away, though, and eventually it will comply. It will take on the texture, look, and smell of melted ice cream.
  3. Add the pinch of salt and give it one last good whisking.
  4. Dump the mixture into your ice cream machine and process according to your machine's directions. This recipe fills my 2 qt ice cream maker and it takes me 30 minutes.
  5. When done, remove the ice cream to a separate large bowl to prevent it from freezing to the sides of the machine.
  6. With a small spoon, drop the ice cream into your mold. Ensure you tamp down each spoonful thoroughly to avoid air pockets or your bars may break when removing from the mold. Freeze any leftovers in an airtight container (place a layer of plastic wrap flush across the top to prevent frost) to be enjoyed as ice cream.
  7. Place the tops on the mold (or put your craft sticks centered in each cup about 3/4 to the bottom and cover with plastic wrap) and freeze for a minimum of 3 hours.
  8. When ready to enjoy you may have to use a little elbow grease to rock the bars back and forth to release from the mold. 
  9. Enjoy immediately as they will melt!
Note: My mold had 6 bars in it so I had some ice cream left over. I prefer to freeze this recipe into bars because if you have just a tub of ice cream, after you leave it in the freezer long enough it hardens up so much that you have to leave it sitting out to soften up just to eat it. This way it goes right from the freezer to my belly!

Your cocoa powder should only have 1 ingredient.

This does NOT want to be mixed.
 
Like melty ice cream.
 
whirrrrrrrr!

Spoon it in bit by bit. (If you spill any on top, just clean it off with a paper towel prior to putting in the freezer.
Tamp it down well with your spoon to avoid air bubbles.

Seal 'er up and freeze it!

Uh-oh! Didn't do a good job getting rid of that air!

Frozen Fudgy Perfection


Tuesday, June 18, 2013

Avgolemono (Greek Egg Lemon) Soup


Ok, sorry to have to do this, but I'm posting another soup recipe. It's been so snotty out lately in NY with torrential downpours that I've been craving another bowl of warm yummies. There's a Greek restaurant near my house from which my husband and I occasionally break down and order a big container of avgolemono soup. The soup has a slight hint of lemon flavor and a silky amazing brothy base. Most recipes add orzo (little rice-like pasta) and something like corn starch as a thickener. booooo! But avgolemono is a great summer soup because the lemon gives it a bit of a 'cool' sensation, if that makes any sense. And I wants it.

In the spirit of finding a Paleo workaround, I scoured the internets for how to make traditional avgolemono soup and found it wouldn't actually be that difficult to adapt. This recipe requires a technique called "tempering" which is mixing a small amount of a hot ingredient into a cold one. We do this with delicate ingredients like eggs, cream, or chocolate to prevent them from curdling or getting lumpy. It sounds fancy and complicated, but really you just need a whisk and a spoon.

Ingredients
  • 1lb raw boneless chicken breast, diced
  • 3 cloves garlic, smushed with the flat blade of your knife and sliced
  • 1 medium onion, diced
  • 2 cups grated cauliflower (3 cups if you want more "stuff" floating around)
  • 8 cups low-sodium chicken stock
  • 4 eggs
  • 1/2 cup fresh lemon juice (roughly 4 lemons depending on their size)
  • 1 tsp lemon zest
  • 1 - 2 tsp fresh torn parsley leaves
  • Salt and pepper, to taste
  1.  In a large stock pot, combine chicken, garlic, onion, cauliflower and chicken stock and bring to a boil. Immediately reduce the heat and simmer until the chicken is cooked, the onions are translucent, and the cauliflower is of the desired consistency. (Maybe 10 - 15 min?)
  2. While the pot is simmering, in a large bowl lightly whisk the eggs, lemon juice, and lemon zest. Here's a tip to get more juice out of your lemons - roll them on the countertop before you cut them. This will yield more juice when cut and squeezed.
  3. When the chicken and veggies in the pot have reached desired doneness, season with salt and pepper, and add torn parsley leaves.
  4. In order to add the egg mixture to the pot without making scrambled eggs, you'll need to temper the mixture. To do this, use a ladle or large spoon and scoop a bit of hot broth from the pot and pour it into the egg mixture while simultaneously whisking the eggs continuously. Do this a few more times until you add in at least a cup of broth, or feel that the temperature of the mixture has evened out to be stable enough to add to your pot. I err on the side of caution and add a LOT of broth.
  5. When the mixture is tempered to your heart's delight, dump it into the pot while whisking the entire soup until thoroughly combined. Now your soup has that delicious silky texture. Immediately turn off the stove and take the pot off the heat. Your soup is ready to serve!
Note: When re-heating this soup do NOT bring it to a boil as you could disturb the eggs. Heat it up gradually until warm.


I used the large holes on my box grater to grate the cauliflower. You could pulse it in the food processor as well to get this consistency if you don't have a grater.


Sorry this picture is so crappy, I didn't have enough hands. This is me tempering the mixture with some of the hot broth.

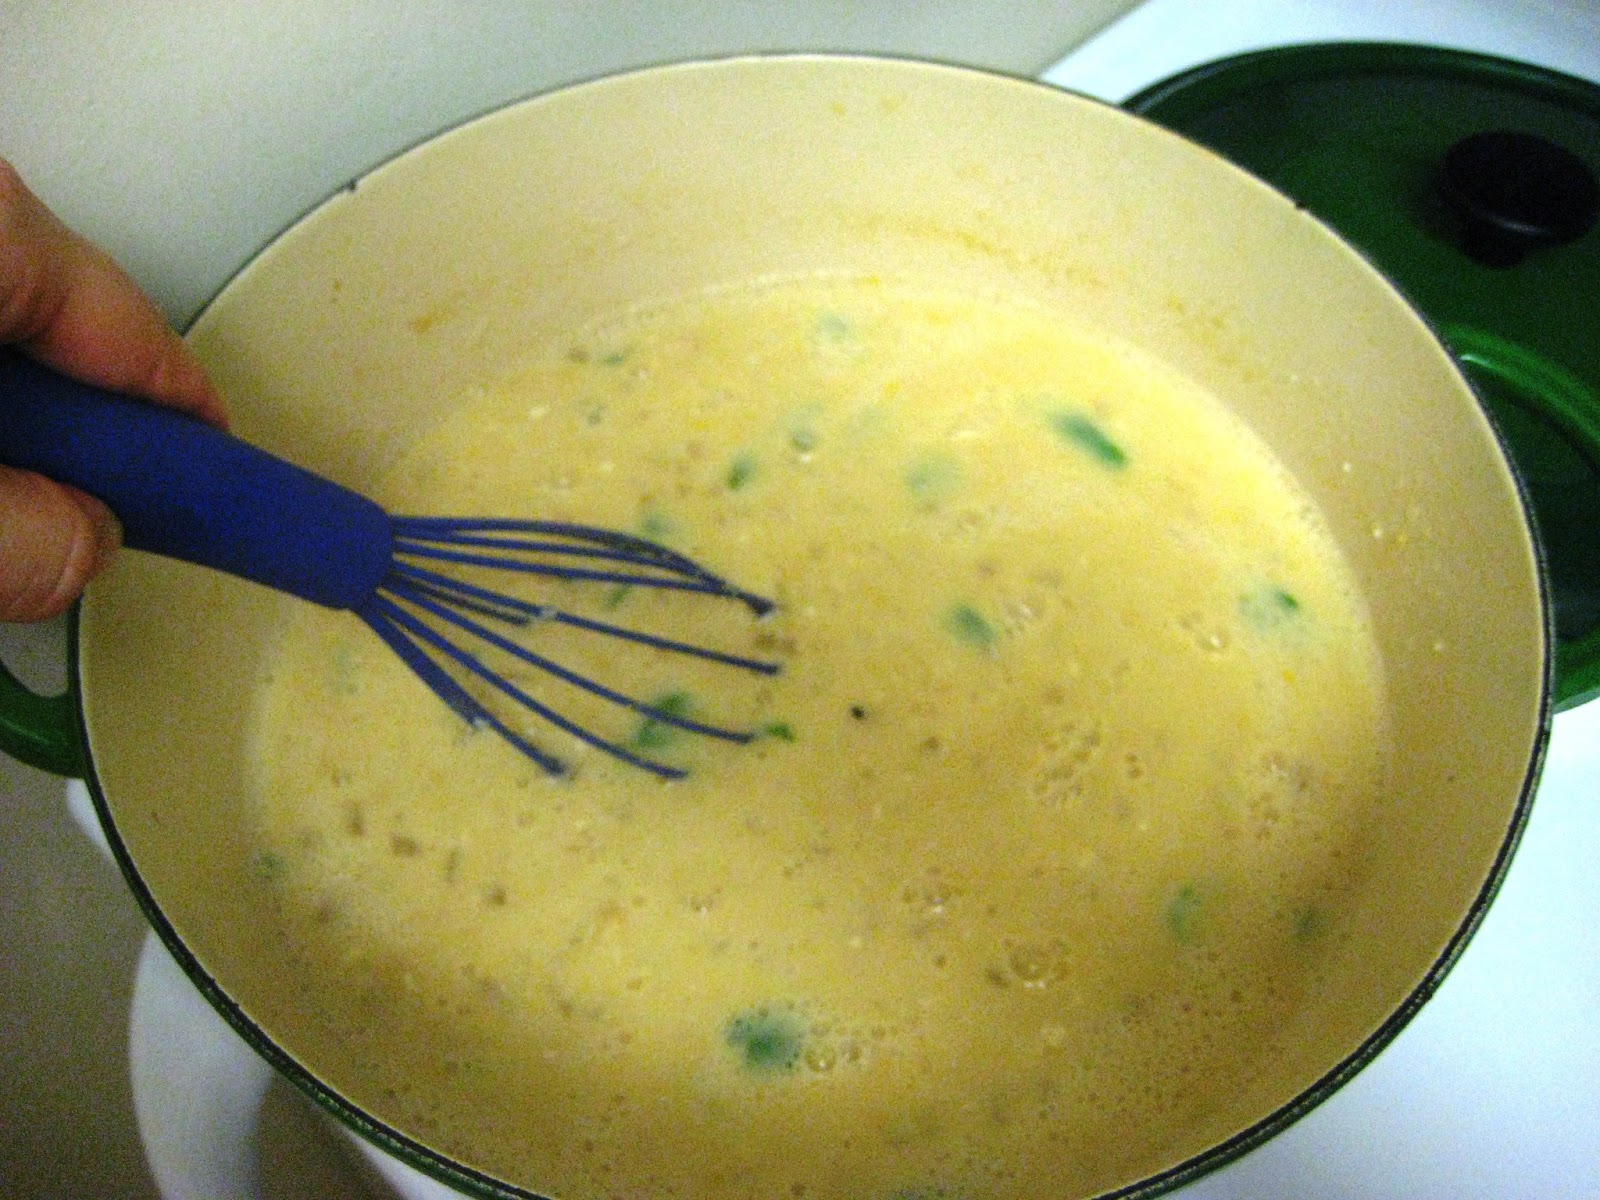
Whisk away!

Boom! Silky Smooth!
Mmmm... silkyyyy

Sunday, June 2, 2013

How to Dispose of Grease and Oil the Safe Way


We may not always stop to think that when we finish preparing a meal and wash our unused oil or grease down the drain we may actually be causing damage to the environment. Did you know that fats, oils, and greases that are put down the drains accumulate in the sewers and congeal - sometimes causing blockages? Well, when this happens, it reduces the amount of sewage that can be processed and that endangers our fresh water and our beaches. No one wants raw sewage overflowing into rivers and beaches, or worse - our own homes!

Just look at this gross, stopped-up sewer! Kind of reminds you of a clogged artery, no?
And no amount of "grease cutting" dish soap is going to help combat this problem. All that will do is clean your pots and pans and wash the grease down the drain faster.

I wonder how much of this used to be bacon grease?

So what's the bottom line? Don't put your grease down the drain!

But what's the best way to get rid of fats, oils and greases if you can't put them down the kitchen drain or flush them down the toilet? You should send it out with the trash. I don't recommend you pour boiling hot grease into your garbage can, so how can you take that liquid and dispose of it with your solids?

Keep an empty container under the kitchen sink to collect wasted fat, oil, and grease. I save glass jars from coconut oil, capers, pickles - even candles! My mother used to use old coffee cans.


After the oil or grease cools slightly, I pour it directly into the jar and re-seal it. I stay away from plastic as I am impatient and do put warm liquids in there and wouldn't want to melt it. (But really, plastic that is not recyclable is probably the best because it was headed to the landfill anyway.) I also made the mistake one day of not letting it cool enough and CRACK! I busted the glass jar. Thankfully I didn't hurt myself, but that was a close call. Don't make the same mistake that I did.

Let's make sure that mother nature doesn't pay the price for your bacon habit.

Whatever container you use, there should be some absorbent material inside to help soak that oil/grease up so it doesn't remain in liquid form. I typically use paper towels that are left over from cleaning, but other ideas are used coffee grounds, clean kitty litter, newspapers, coffee filters, even dirt from outside. As your grease builds up, just add more absorbent material until your container is full. Then toss it out with your household trash.

Big puddles of oil or grease are pretty obvious no-no's for dumping, but we also need to be wary of salad dressings, Paleo mayo that has passed its prime, oil-based meat gravy or meat drippings, etc. There is also grease residue left in your pan after cooking with oils.When I have some fat residue left in a frying pan, I'll wipe the pan out with a dry paper towel to soak up the grease and put the entire paper towel into the grease jar.

Thanks for helping keep our water supply clean!

Friday, May 24, 2013

Sausage Portobello "Pizzas" (cheese optional!)


Sometimes I look at a portobello mushroom and think that nature gave us a little edible dish. But what to put on it? Two tastes that I think go extremely well together are portobello mushrooms and sausage. And with just a few more ingredients you can have your very own portobello "pizzas"!

I decided to splurge a little and put some cheese on mine, but these simple little "pizzas" don't need cheese to still be delicious. If you've been practicing your knife skills, you can whip this up in a few minutes and have it on the table in no time.

Ingredients
  • 6 portobello mushroom caps (peeled, stems removed)
  • Extra Virgin Olive Oil
  • 1 lb ground pork
  • 1 1/2 Tbsp Italian Sausage Seasoning* (see below for recipe)
  • 4 campari tomatoes (these are smaller than a beefsteak but larger than cherries)
  • 5 cloves garlic, sliced thin
  • 12 large basil leaves, chiffonaded
  • 1 6-oz package organic shredded mozzarella cheese (optional)
  • salt, fresh pepper, and dried oregano to taste
  1. Heat a tablespoon of oil in a frying pan over medium-high heat. 
  2. With your hands, mix the Italian Sausage Seasoning into the ground pork until combined. Crumble the sausage mix into the frying pan and cook until lightly browned. Move the meat in the frying pan off to the side.
  3. Set oven to broil.
  4. Line a sided baking sheet with foil and drizzle with olive oil. Place the mushrooms face down and drizzle generously with more oil. Broil for 5 - 7 minutes, until slightly soft, then remove from oven and flip mushrooms over so that the gills are facing up.
  5. Mix the garlic, sliced basil, and cheese (if using cheese) into the sausage mixture in the frying pan with another tablespoon or so of oil. If the mixture is still hot the cheese may start to melt, which is fine.
  6. Fill each mushroom cap with a heap of sausage mixture and top with sliced tomatoes. Sprinkle each with salt, pepper, and oregano and put back under the broiler another 3 - 5 minutes, until tomatoes begin to wilt and soften.
  7. Remove from oven and serve hot!
----
*I've used this seasoning mix from Melissa Joulwan in a few recipes so far on this site. I always recommend you keep some in your spice cabinet, pre-made. I always use it to make my own sausage meat. I typically use 1 1/2 Tbsp per pound of ground pork. In case you need the recipe for the mix, here it is again. Note this will yield MUCH more than is necessary for this recipe so you can save the extra for next time.

Italian Sausage Seasoning Mix
  • 4 tsp dried parsley
  • 1 Tbsp dried Italian herbs
  • 2 tsp ground black pepper
  • 2 tsp garlic powder
  • 2 tsp paprika
  • 4 tsp salt
  • 1 tsp crushed red pepper flakes
  • 1 1/2 tsp fennel seed (optional) - you should use this if you have it, though, it really gives the meat that sausagey taste
In a medium bowl, crush the dried parsley and Italian herbs with your fingers or a fork to release their flavor. Add the black pepper, garlic powder, paprika, salt, red pepper flakes, and fennel seed. Mix with a fork.
----
Tips for Variations:
  • You can mix anything into the sausage filling. Why not try some chopped broccoli rape (saute first, until soft)?
  • Don't want to use campari tomatoes? Try using halved grape tomatoes instead. 
  • Sprinkle some crushed red pepper on top for a hint of spice.
  • Try switching out the mozzarella cheese with crumbled feta instead - yum!
Magic Trick - add a little seasoning and poof! You now have sausage!

I hate ground meat squishing between my fingers so I always wear gloves for this part.

Browned to perfection!

Getting the pan ready...
Peel the mushrooms starting from the inside lip..

And then you have the nice, clean, white meat underneath.

I typically leave the gills on my mushroom, but you can remove them if you like.

Just a few short minutes under the broiler and our portobello crusts are all ready for filling!

Love these campari tomatoes! If you don't have any, you can use grape or cherry.
What was that fancy word used earlier? Chiffonade? Well, here it is. Pretty simple, actually. Just stack all your basil leaves together and roll them up tightly. Then use your knife to slice the rolled basil into thin little ribbons. This is a quick and easy way to slice delicate leafy herbs.
 
And here is the product of your chiffonading! (This isn't all the basil, you should be left with much more than this.)


To use cheese or not is completely up to you. I do use a little dairy here or there. This meal would be delicious even without it.

And here we are, ready for the oven again!

 FIN.

Sunday, May 19, 2013

Worcestershire Sauce


I usually shy away from recipes with Worcestershire Sauce because it bothers me that this little staple condiment contains processed sugar. Then I decided it can't be too hard to mimic the flavor and made my own. This mixture is a pretty decent substitute and can be kept in a jar ready to marinate your meats and mix into your sauces and dressings!

Ingredients:
  • 1/2 cup apple cider vinegar
  • 2 Tbsp water
  • 2 Tbsp coconut aminos
  • 1 Tbsp palm sugar (aka coconut crystals)
  • 1/4 tsp garlic powder
  • 1/4 tsp onion powder
  • 1/4 tsp mustard powder
  • 1/4 tsp powdered ginger
  • 1/8 tsp cinnamon
  • a few rounds of fresh ground pepper
  1. Add all ingredients to a small stock pot or gravy pot and bring to a boil. Allow to boil for about 45 seconds or so and remove from heat. 
  2. Cool completely then store in an airtight container. 
It goes right from my little pot into a clean (re-used) jar.

A little masking tape for a label and I stick it right on my fridge door.


Sunday, May 5, 2013

Broccoli Velouté Soup


It just occurred to me I haven't shared a recipe the entire month of April! Well, maybe you'll forgive me when you hear why. We just went to contract on our very first home! Aaaaaaah!

We are so excited and can't WAIT for moving day to come. Pretty soon I will have a nice big kitchen with tons of LIGHT and WINDOWS! No more underexposed food photos for you all! (The kitchen is HORRIBLY outdated, but that will be one of our first projects to tackle this year.)

Anywho, these past few months have been jam packed with house hunting and then the process of going to contract so I guess I haven't really put much thought into endeavoring to come up with new food ideas. I've been battling a cold on and off and last week it came back with a vengeance. I know the weather is warming up, but my throat was killing me and I was in the mood for something warm and soothing. When I looked in my fridge, it was pretty bare. I didn't even have any meat defrosted. Nothing! I did have a bag of broccoli florets that was on its way out the door if it didn't get made right away. I'd been wanting to make a broccoli soup for years so I thought this was the perfect opportunity.

Velouté is a fancy french way of saying "velvety" (or creamy). And I'm fancy like that.

Ingredients
  • 1 - 2 Tbsp extra virgin olive oil
  • 3 stalks of celery, sliced
  • 1 large onion, diced about the size of your celery
  • 5 cloves garlic, sliced
  • 8 - 10 cups broccoli florets
  • 4 cups low sodium chicken stock
  • 1 1/2 cups water
  • 1Tbsp dried thyme
  • 1 can full fat coconut milk (cream separated from the water*)
  • salt and fresh ground pepper, to taste 
  1.  Heat oil in a large dutch oven or stock pot over medium-high heat.
  2. Saute the onion and celery until softened about 5+ minutes. 
  3. Add garlic and cook another 30 seconds or so until the garlic becomes fragrant (don't let it get browned as it may turn bitter).
  4. Add the broccoli, broth, water, and thyme to the pot and crank the heat up to bring the pot to a boil. Reduce to a simmer and cook until the broccoli is tender (8 - 10min or so).
  5. When you're satisfied the vegetables are soft enough, puree the soup with a stick blender or a regular blender (you may have to split it into batches with a regular blender). Stir the coconut cream in very well and then season to taste with salt and pepper (try starting with 1tsp salt and go from there).
  6. Serve hot!
*When either left sitting alone long enough, or chilled in the fridge, coconut milk will naturally separate with the creamy solids rising to the top and the clear water gathering in the bottom. DON'T SHAKE UP YOUR CAN OF COCONUT MILK! Carefully open the top and spoon the creamy portion into a small bowl or liquid measuring cup. You should be left with about 1 cup of creamy solids which we'll use to make the soup "velouté" (you can do whatever you like with the leftover water). I promise the soup won't taste like a piña colada.


The creamy solids rise to the top.

You'll get about a cup of cream before you hit clear water.

BLEND WELL!