Showing posts with label Dinners. Show all posts

Saturday, May 16, 2015

Shrimp Scampi


This is a great meal that's perfect for summer when we have to be wary of heating up the house with the oven. And shrimp cooks so quickly that this whole meal can be on the table in no time - with only one pan to clean!!!

Ingredients
  • 2 tablespoon almond flour or almond meal (if you have some Italian Seasoned "Bread" Crumbs pre-pared - use those!)
  • 1 teaspoon extra virgin olive oil + 1 Tbsp + 1 Tbsp
  • 1 Tbsp clarified butter (if you don't use butter, substitute with more olive oil or grapeseed oil)
  • 1 lb large shrimp (cleaned, peeled and de-veined)
  • 2 Tbsp clarified butter (or olive oil for dairy-free)
  • kosher salt and fresh ground black pepper
  • 4 cloves garlic, slivered
  • 1 lemon; juiced
  • 2 tsp finely chopped fresh parsley
  • 2 10oz bags baby spinach
  1. Heat your almond flour in a large non-stick frying pan on medium high heat and drizzle with the 1 tsp of olive oil. The goal is to toast the almond flour into browned crumbs. The oil will help them stick together a bit. Remove from the heat when done and place in a small bowl off to the side.
  2. Place your frying pan back on the stove on medium high heat and add your 1 Tbsp of oil and 1 Tbsp of butter (or more oil). When the pan is warm enough, add in your garlic slivers and saute for 30 seconds or until fragrant. Don't brown your garlic just yet because it still has longer to go in the pan.
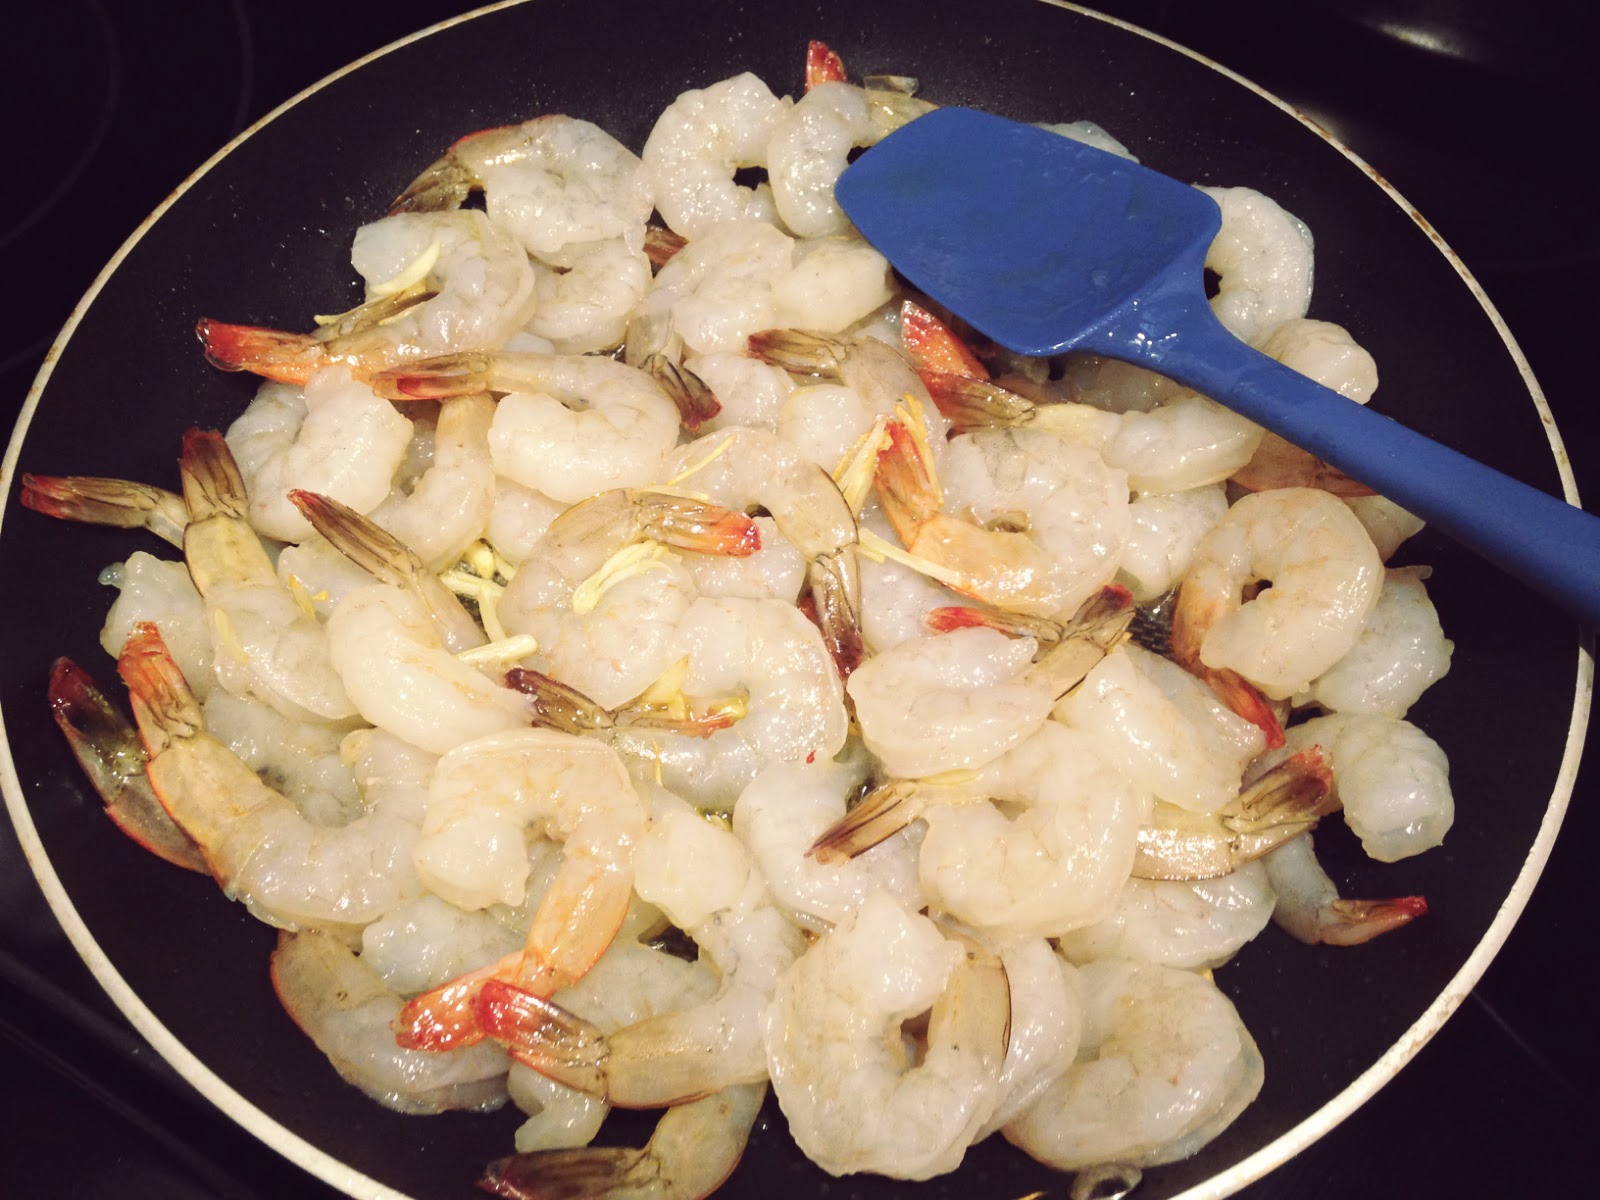
  3. Add the shrimp to your pan (make sure you dried them as best you can before tossing them in) and saute until just cooked through. Stir periodically to ensure even cooking. They'll take on a light pink color when done. You know you overcooked your shrimp if they curl into a super tight ring. No bueno.
  4. Sprinkle with salt and pepper to taste, and add the parsley and lemon juice to the pan. Stir well before removing the shrimp from the heat to a bowl off to the side.
  5. Return your pan to the heat and add the remaining 1 Tbsp oil. Add your spinach to the pan and saute a few minutes until just wilted. Stir occasionally to ensure the leaves on top cook evenly with the leaves on the bottom. When done, drain excess liquid from the pan.
  6. Plate by layering a helping of spinach and arrange your shrimp on top. You can spoon on some of the butter/oil/lemon juices from the shrimp bowl and then sprinkle with the toasted almond flour crumbs.
Toasting that almond flour into crumbs

Nothing like fresh ingredients!

About 30 seconds on the garlic is all you need.
If you fry your garlic for too long, it will get a burnt metallic taste.

Toss in them scrimps!

Careful not to overcook your shrimp or they'll become tough and chewy!


You may be questioning why so much spinach, well...

...spinach sure does shrink!

Plate by layering in a helping of spinach and arranging your shrimp on top;
sprinkle with your toasted almond flour crumbs and serve!

Yum!

Saturday, October 11, 2014

Grandma's (Paleo) Meatballs


My Gramma was pretty much the coolest human being who ever lived. Over the course of my entire life, she stuffed me full of delicious Italian food. Being that she was the first generation of Italian immigrants born in the USA, that Italian food was pretty dang good. Gramma didn't exactly know the meaning of Paleo when she was alive, but she knew the secret to making moist and delicious meatballs. Unfortunately for those of us who eat Paleo, those meatballs were stuffed with Parmesan cheese and Italian seasoned bread crumbs.


But guess what? If you strip both those things away, and swap in a little seasoned almond flour for the breadcrumbs, you'll be on your way to meatballs just the way Gramma used to make 'em - only Paleo style.

Why is my gramma giving metal fingers?
Because she's a M*****F****** BOSS, that's why!
But on to the recipe! Here are a few general notes for the best gaddang meatballs you've ever had in your entire life.

General Notes:
  1. Instead of boring ground beef, use meatball mix, which is equal parts beef, pork and veal.
  2. You need the egg AND the almond meal. Don't leave either one out. They'll bind the meatball and keep it spongy and moist. No one wants a gristly meatball. Blech.
  3. Use your hands to mix everything up - but don't overdo it. (And if you hate getting meatfingers, try wearing rubber gloves like I do. I have a thing about getting meatfingers, don't ask.)
  4. When rolling your balls, keep a light touch. Baddabing!
  5. Don't skip the sear. That delicious brown crust will take the meatball to the next level.
  6. Simmer your balls in (what better be) a delicious homemade sauce for 2 hours MINIMUM, though I usually go for 3. They'll be so tender it'll make you want to cry.
If you break any of these meatball commandments, Grammies will come haunt your ass. That's 4 feet 10 inches of pure Eye-talian spitfire. Trust me, you don't want that.

Need a tomato sauce recipe? Try Hand Crushed San Marzano Tomato Sauce. Just swap the pork out and the meatballs in. (Or leave it. You can never have too much meat, suckas.)


Ingredients

  • 2 lb meatball mix (or just plain ground beef if you suck at life)
  • 1 onion (grated or minced)
  • 5 cloves garlic (grated or minced)
  • 1 cup seasoned almond flour
  • 2 tsp salt
  • 1 egg
  • 1 Tbsp minced fresh parsley
  • 1 small drizzle of extra virgin olive oil
  1. Add all ingredients to a large bowl and combine with your hands. (See note #3 above regarding meatfingers. Yuck.)
  2. Roll the balls gently with your hands. If they stick to your fingers, coat your hands very lightly with a bit of the olive oil. I like big balls (zing!) so I make them about 2" a pop. I get about 18 large meatballs out of 2 lbs of meat. Set the balls aside on a baking sheet lined with parchment or wax paper.
  3. Heat about a tablespoon of extra virgin olive oil in a frying pan over medium high heat. Sear the outside of the meatballs in 2 batches until they have a nice brown crust. 
  4. Drop them in your saucepot when done and simmer on the stove for 2-3 hours.
(NOTE: You can add other meats to your pot along with the meatballs. I like tossing in sausages, pork bracciole, and even spareribs. Just remember to sear everything in the frying pan before you put it in the pot.)

the beauty of the meatball mix


That's my grammies' own big aluminum pot.
So many thousands of meatballs have passed through this pot.
It's like the holy grail of meatballs.
Buon Appetito!


Sunday, March 30, 2014

Cornish Game Hens (No Oil & No Sticking!)


Would you believe me if I said you could cook these little Cornish game hens (or even a full size chicken) directly on a pan with no added oil or butter? Why so skeptical? It's not like you have to rub them down with unicorn blood or anything. Even a novice chef can learn this secret (but simple) method for cooking poultry without added fat. I was first introduced to this method by Chef Paul and Chef Sui Lon of the Miette Culinary Studio in NYC during a team-building cooking class my office hosted. If I hadn't seen it with my own eyes, I might not have believed it either. I was determined to repeat the experiment in my own kitchen and voila - worked like a charm!

Now, I used my cast iron pan because I don't think it gets enough love, but at the cooking class we used a stainless steel roasting pan. Either would work fine. Keep reading to learn the secret!

Ingredients: 
  • 2 Cornish game hens
  • 4 cloves garlic
  • 4 sprigs rosemary
  • 4 sprigs sage
  • 8 sprigs thyme
  • 1/4 of a whole lemon (sliced lengthwise into two wedges)
  • salt
  • pepper
  • garlic powder
  • paprika
  1. Preheat oven to 375F. When it comes to temperature, place your empty cast iron skillet or stainless steel roasting pan on a middle rack and let heat for at least 20 minutes.
  2. Prepare your hens by removing any package of giblets from inside the cavity and patting them dry with paper towels.
  3. Split all the fresh herbs evenly in two piles and group together to form little bouquet garnis. No need to tie with string.
  4. Stuff the inner cavities of each hen with two garlic cloves, one small lemon wedge, and one of the herb bouquets. There should still be a little wiggle room inside so that the hen will cook completely through. If there isn't, your lemon might still be too big.
  5. Sprinkle the outside of the hens generously with salt, pepper, garlic powder, and paprika and rub the spices into the skin with your hands. The bird should be covered on all sides. Set aside on a plate (or this can be done the night before and stored in the fridge).
  6. AND NOW FOR THE BIG SECRET! When the pan in the oven has had at least 20 minutes to heat up, you're going to dry the crap out of the bottoms of each hen by wiping vigorously with paper towels. This is not the tentative patting of meat, this is a full on RUB DOWN. The bottoms of the hens must be COMPLETELY DRY or you risk them sticking to the pan. Rub those babies hard. Don't worry about rubbing off the seasoning, remember, this is just the bottom of the hen you're wiping. Once you are CERTAIN they are dry you're going to quickly remove the hot pan from the oven and place the hens inside (bottoms down, breast-side up). They should make a loud sizzling sound the minute they touch the hot pan. You may be tempted to lift them to see if they have stuck. Don't. Leave 'em alone and quickly get that pan back in the oven. This whole process should take less than 30 seconds from the moment the pan comes out of the oven.
  7. Let the hens roast in the oven for 45 minutes. If you're unsure if the hens are done, test the meaty part of the thigh with a meat thermometer to verify they've reached at least 165F. Or slice through the thigh and ensure the meat is cooked through and juices run clear. If you have a reliable oven, though, 45 min should be sufficient.
  8. Let the meat rest at least 10min before carving/serving. You can serve 1 whole hen per person, or take some sharp kitchen shears and cut clear through the back bones and breast bones to serve one half chicken per person (after removing the stuffing).
  9. Tip: If you want to cook a large amount of hens at once, follow the same method and still cook for 45 minutes. If you have more than one pan, though, rotate the pans (which is on top versus which is on bottom) every 15 minutes to ensure even cooking.
We fancy, huh!


This is all you need to stuff two hens. Remember to keep the lemon wedges small.
Hello ladies
Rub the crap outta them to get all the water off. If you think you are rubbing hard, rub harder.
QUICKLY get them into the hot pan...
...and back in the oven.
So... beautiful... should have sent a poet...


See - no sticking!
You can easily cut down the front and back of each hen to create
individual half-portions to serve laying on their side on the plate.

Or serve whole!


Tuesday, January 14, 2014

Hand-Crushed San Marzano Tomato Sauce

Just because we're freezing our butts off here in the Northeast and there's not a tomato crop in sight doesn't mean we can't still enjoy beautiful homemade tomato sauce. If you missed the boat last summer of storing enough fresh tomato sauce to last through the winter it's not too late! Believe it or not, you can still achieve a beautiful pot of sauce from canned whole tomatoes. In this particular recipe, I chose to use a large piece of pork to add to my sauce pot, but you could throw in anything. Try meatballs, sausages, braciole, or even calamarri and shrimp!

Ingredients
  • Large piece of pork, about 1-2 lbs
  • Coconut oil
  • 1 large carrot, grated
  • 1 medium onion, diced
  • 8 cloves garlic, peeled and sliced
  • 1 6oz can tomato paste
  • 3 28oz cans whole peeled San Marzano tomatoes (if you have trouble finding them in the regular grocery store, try an Italian grocery or Italian meat store)
  • 1 tsp salt (plus more to taste, if needed)
  • 1/8 tsp pepper (plus more to taste, if needed)
  • 1 tsp dried oregano
  • 2 bay leaves
  • Fresh basil leaves
  1. Prepare the canned tomatoes by pouring them into a very large bowl. Crush the tomatoes by squeezing them in your hands until all the large pieces are broken up.
  2. In a large 6qt saucepan, sear the pork briefly on all sides on high heat with 1-2 Tbsp coconut oil. Remove the meat, reserving the juices in the pan, and put the pork on a plate off to the side.
  3. In the same pan, saute the carrot and onion until soft on medium-high heat. Add the garlic and continue to saute another 30 seconds until fragrant. Add the can of tomato paste and saute another 30 seconds.
  4. Add the bowl of crushed tomatoes along with the salt, pepper, oregano, and bay leaves. Don't put the basil in just yet. Stir the pot well and then nestle the pork back in. Bring to a boil. Once boiling, lower the heat to simmer on low 3-6 hours. The longer the sauce cooks, the thicker and more fragrant it will be. You want to at least cook it long enough so that the meat falls apart when pulled with a fork. Taste regularly and add more salt/spices as needed.
  5. Tear apart 2 - 3 large handfuls of basil leaves and stir into the sauce right before serving to maintain the freshness and flavor of the herb. Serve over zucchini noodles, or spaghetti squash.
Not a fan of getting my hands dirty. Gloves for the win!


Growing up, my mom and grandmother always added white sugar to their sauce to cut the acid of the tomatoes, but carrot actually does the same thing and is a much healthier alternative! Grated up small like this, you can't even tell it's in there.

All ingredients prepped and ready to go!
The Italian grocery store actually sells packaged pork labelled "for sauce". Perfecto!


Nestle the pork back into the pan

Fin! Bellissimo!

Wednesday, June 26, 2013

Pan-Fried Pork Chops

One of the simplest recipes in my repertoire are these delicious, pan-fried pork chops. They're perfect for a quick weeknight meal because they only take minutes to prepare. My favorite part is the flavorful juice that comes seeping out as they cool on a plate fresh from the pan. I like to cut my meat into small pieces and sop those extra juices up with each bite.

Mmmm... juicy
Ingredients
  • 4 boneless center cut pork chops 
  • Garlic powder
  • Salt and fresh ground pepper
  • Smoked paprika (aka bacon spice!)
  • Coconut oil
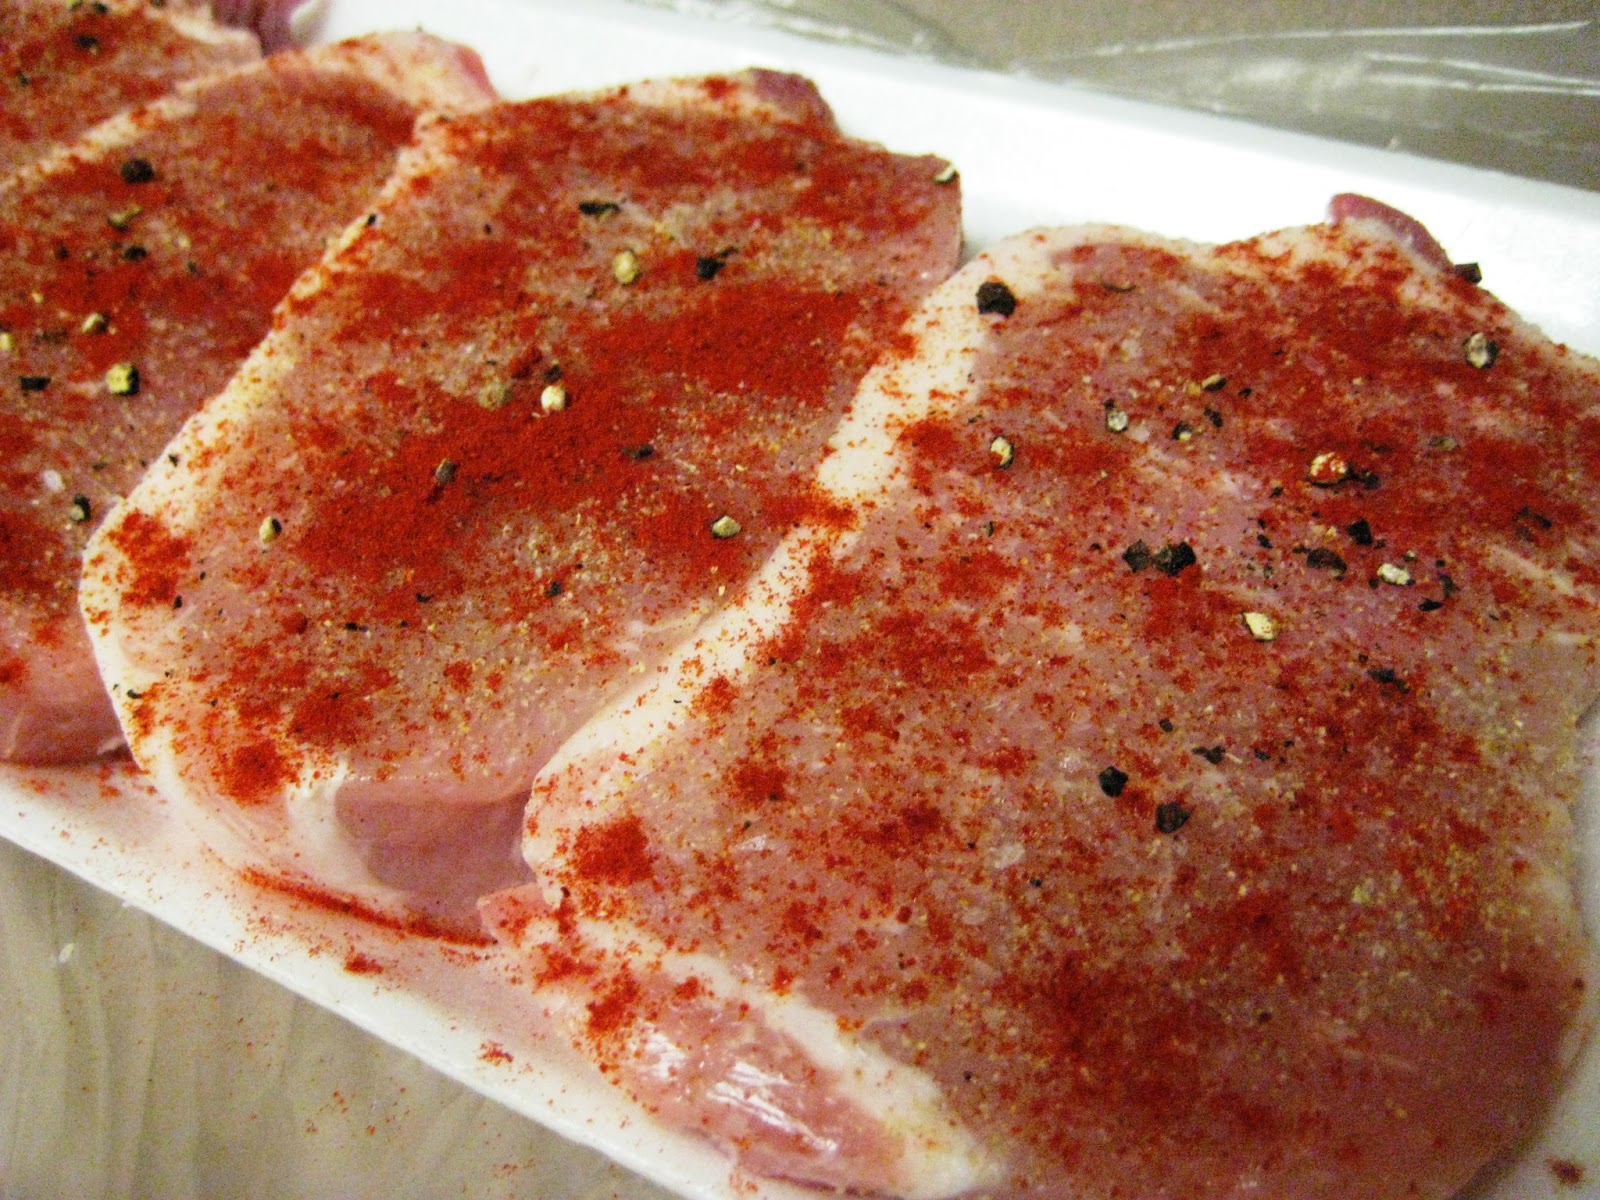
  1. Season both sides of the pork chops with garlic powder, salt, pepper, and smoked paprika - all to taste.
  2. Heat a tablespoon or two of coconut oil in a pan over high heat (not the highest, but up there).
  3. Fry the chops a few minutes on each side, until only slightly pink or just white when cut open. The outside will get brown and caramelized which is where the delicious flavor comes from, but cooking too long will dry the chops out.
  4. Let sit at least 5 minutes on a plate before serving so those tasty juices can come seeping out. Drizzle any leftover juices on top when serving.
Love that smoked paprika!

Mmmm... caramelized

Juices starting to seep out... the best part!


Friday, May 24, 2013

Sausage Portobello "Pizzas" (cheese optional!)


Sometimes I look at a portobello mushroom and think that nature gave us a little edible dish. But what to put on it? Two tastes that I think go extremely well together are portobello mushrooms and sausage. And with just a few more ingredients you can have your very own portobello "pizzas"!

I decided to splurge a little and put some cheese on mine, but these simple little "pizzas" don't need cheese to still be delicious. If you've been practicing your knife skills, you can whip this up in a few minutes and have it on the table in no time.

Ingredients
  • 6 portobello mushroom caps (peeled, stems removed)
  • Extra Virgin Olive Oil
  • 1 lb ground pork
  • 1 1/2 Tbsp Italian Sausage Seasoning* (see below for recipe)
  • 4 campari tomatoes (these are smaller than a beefsteak but larger than cherries)
  • 5 cloves garlic, sliced thin
  • 12 large basil leaves, chiffonaded
  • 1 6-oz package organic shredded mozzarella cheese (optional)
  • salt, fresh pepper, and dried oregano to taste
  1. Heat a tablespoon of oil in a frying pan over medium-high heat. 
  2. With your hands, mix the Italian Sausage Seasoning into the ground pork until combined. Crumble the sausage mix into the frying pan and cook until lightly browned. Move the meat in the frying pan off to the side.
  3. Set oven to broil.
  4. Line a sided baking sheet with foil and drizzle with olive oil. Place the mushrooms face down and drizzle generously with more oil. Broil for 5 - 7 minutes, until slightly soft, then remove from oven and flip mushrooms over so that the gills are facing up.
  5. Mix the garlic, sliced basil, and cheese (if using cheese) into the sausage mixture in the frying pan with another tablespoon or so of oil. If the mixture is still hot the cheese may start to melt, which is fine.
  6. Fill each mushroom cap with a heap of sausage mixture and top with sliced tomatoes. Sprinkle each with salt, pepper, and oregano and put back under the broiler another 3 - 5 minutes, until tomatoes begin to wilt and soften.
  7. Remove from oven and serve hot!
----
*I've used this seasoning mix from Melissa Joulwan in a few recipes so far on this site. I always recommend you keep some in your spice cabinet, pre-made. I always use it to make my own sausage meat. I typically use 1 1/2 Tbsp per pound of ground pork. In case you need the recipe for the mix, here it is again. Note this will yield MUCH more than is necessary for this recipe so you can save the extra for next time.

Italian Sausage Seasoning Mix
  • 4 tsp dried parsley
  • 1 Tbsp dried Italian herbs
  • 2 tsp ground black pepper
  • 2 tsp garlic powder
  • 2 tsp paprika
  • 4 tsp salt
  • 1 tsp crushed red pepper flakes
  • 1 1/2 tsp fennel seed (optional) - you should use this if you have it, though, it really gives the meat that sausagey taste
In a medium bowl, crush the dried parsley and Italian herbs with your fingers or a fork to release their flavor. Add the black pepper, garlic powder, paprika, salt, red pepper flakes, and fennel seed. Mix with a fork.
----
Tips for Variations:
  • You can mix anything into the sausage filling. Why not try some chopped broccoli rape (saute first, until soft)?
  • Don't want to use campari tomatoes? Try using halved grape tomatoes instead. 
  • Sprinkle some crushed red pepper on top for a hint of spice.
  • Try switching out the mozzarella cheese with crumbled feta instead - yum!
Magic Trick - add a little seasoning and poof! You now have sausage!

I hate ground meat squishing between my fingers so I always wear gloves for this part.

Browned to perfection!

Getting the pan ready...
Peel the mushrooms starting from the inside lip..

And then you have the nice, clean, white meat underneath.

I typically leave the gills on my mushroom, but you can remove them if you like.

Just a few short minutes under the broiler and our portobello crusts are all ready for filling!

Love these campari tomatoes! If you don't have any, you can use grape or cherry.
What was that fancy word used earlier? Chiffonade? Well, here it is. Pretty simple, actually. Just stack all your basil leaves together and roll them up tightly. Then use your knife to slice the rolled basil into thin little ribbons. This is a quick and easy way to slice delicate leafy herbs.
 
And here is the product of your chiffonading! (This isn't all the basil, you should be left with much more than this.)


To use cheese or not is completely up to you. I do use a little dairy here or there. This meal would be delicious even without it.

And here we are, ready for the oven again!

 FIN.