Showing posts with label Quick Meals. Show all posts

Monday, January 11, 2016

Roasted Marrow Bones


If it seems crazy to you that we'd eat the marrow out of bones, let me remind you that this is about as primal and ancient a dish as it gets. Many animals, and our very own ancestral humans, crack open the bones of animals and suck out the delicate marrow. For primal hunters living off the land, the marrow served as an excellent source of nutrition - protein, healthy fats and fat-soluble vitamins, etc etc etc.

Now, I'm all for modernizing so I get my bones pre-cut from the grocery store and roast them prior to consumption. Your butcher can also be a good source for marrow bones - ask for beef, veal, lamb, etc. And the best part - they're super cheap!

If you've never had bone marrow you may be wondering how to eat it or serve it and you've got a few options. Note that the marrow is very rich with a high fat content so you likely would only eat 1-2 bones depending on their size. And here's how:
  1. Serve 1-2 marrow bones as a standalone appetizer. You can leave them plain or make an oil-based sauce as a topper (e.g. olive oil, parsley, and garlic or even an olive tapenade, etc).
  2. Serve 1-2 marrow bones on a bed of simple greens with a dressing of olive oil, lemon and salt.
  3. Scoop out the marrow and serve it rubbed over a steak (grill the steak first).
  4. Scoop out the marrow and serve it spread on Paleo crackers.
So many ideas! Now if you make these, save the bones in the freezer when you're done eating the marrow and you can use them to make a healthy and budget-friendly stock. Stay tuned for the bone broth recipe!

Ingredients
  • Marrow bones (I used beef)
  • Coconut oil
  • Salt and pepper
  1. Preheat the oven to 400F and line a roasting pan with foil
  2. Lightly coat the bottom of the pan (on the foil) with coconut oil so the bones won't stick to the foil
  3. Arrange your bones in the pan and sprinkle with salt and pepper
  4. Roast for about 15 minutes, until you see the marrow begin to bubble
There are special marrow spoons you can buy for eating it out of bones, but a seafood pick/fork, espresso spoon, or even chopstick would work fine. You can also go primal and suck it directly out of the bone when no one's looking. 

Enjoy!


Sunday, June 7, 2015

Strawberry Rocket Salad


I always look forward to summer for the explosion of fresh garden fruits and veggies. It's no fun buying ingredients in their off-season, so I tend to wait until the warmer weather before purchasing berries and the like. And oh these honeys were worth the wait!

One of my favorite lettuce leaves is arugula, also known as "rocket". It's in the same family as mustard greens and has a nice peppery flavor. I love pairing it with sweet ingredients like strawberries, cranberries, and almonds and a simple dressing of lemon and olive oil for a summer hit!

Ingredients

  • Fresh washed baby arugula (rocket!)
  • Extra virgin olive oil
  • Fresh lemon juice
  • Salt and pepper, to taste
  • Strawberries, hulled and sliced
  • Sliced almonds
  • Dried cranberries (juice-sweetened of course, no processed sugars added!)
  1. Season your lettuce before adding in the chunky bits. Depending on how much salad you want to make, you should adjust the amount of oil, lemon, and salt/pepper to taste.
  2. Toss your seasoned lettuce and now add in the chunky bits! Toss in the strawberries, almonds, and cranberries and there you have it!
Note: Want to turn this into an entree salad? Add some grilled chicken. Boom!


Summer berries for the win!

I find it's easier to toss lettuce by putting in all the seasonings before adding in the rest.


If you can't find cranberries seasoned with fruit juice instead of processed sugars
like this one from Made in Nature, you can substitute for dried currants or raisins.

Ahhh... freshness 

Saturday, May 16, 2015

Shrimp Scampi


This is a great meal that's perfect for summer when we have to be wary of heating up the house with the oven. And shrimp cooks so quickly that this whole meal can be on the table in no time - with only one pan to clean!!!

Ingredients
  • 2 tablespoon almond flour or almond meal (if you have some Italian Seasoned "Bread" Crumbs pre-pared - use those!)
  • 1 teaspoon extra virgin olive oil + 1 Tbsp + 1 Tbsp
  • 1 Tbsp clarified butter (if you don't use butter, substitute with more olive oil or grapeseed oil)
  • 1 lb large shrimp (cleaned, peeled and de-veined)
  • 2 Tbsp clarified butter (or olive oil for dairy-free)
  • kosher salt and fresh ground black pepper
  • 4 cloves garlic, slivered
  • 1 lemon; juiced
  • 2 tsp finely chopped fresh parsley
  • 2 10oz bags baby spinach
  1. Heat your almond flour in a large non-stick frying pan on medium high heat and drizzle with the 1 tsp of olive oil. The goal is to toast the almond flour into browned crumbs. The oil will help them stick together a bit. Remove from the heat when done and place in a small bowl off to the side.
  2. Place your frying pan back on the stove on medium high heat and add your 1 Tbsp of oil and 1 Tbsp of butter (or more oil). When the pan is warm enough, add in your garlic slivers and saute for 30 seconds or until fragrant. Don't brown your garlic just yet because it still has longer to go in the pan.
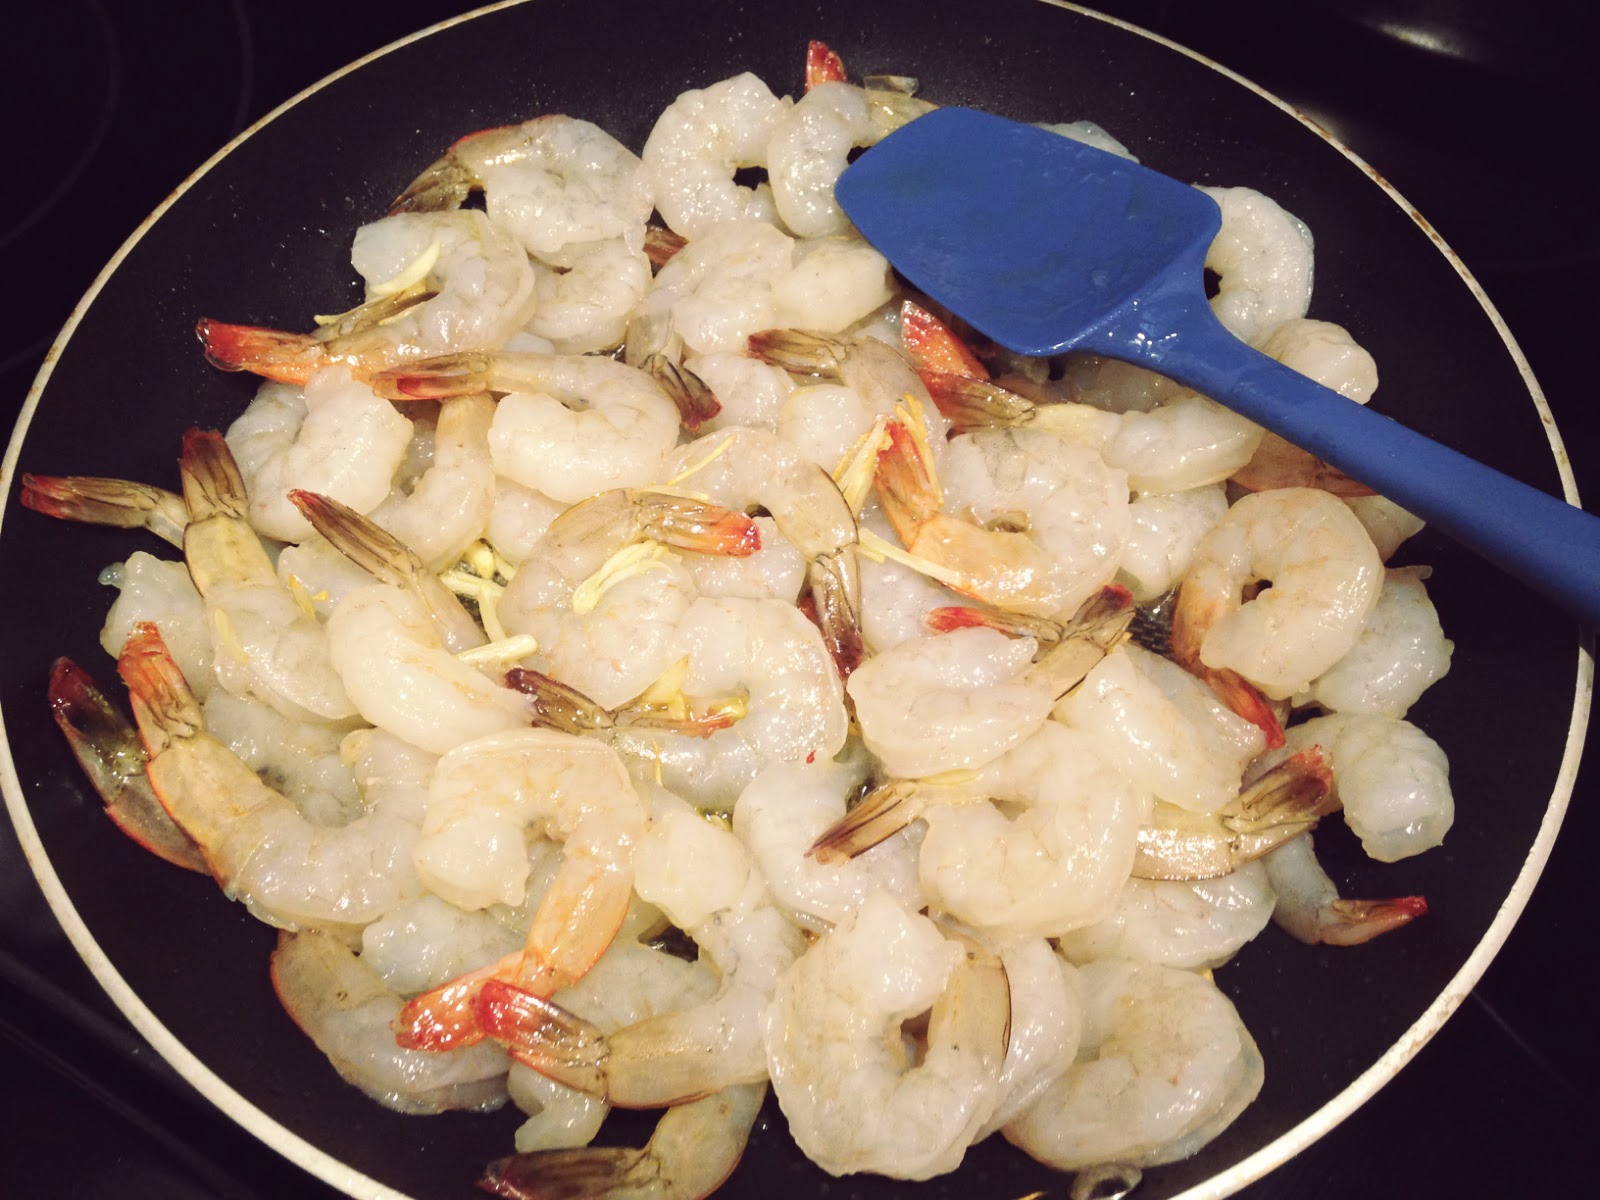
  3. Add the shrimp to your pan (make sure you dried them as best you can before tossing them in) and saute until just cooked through. Stir periodically to ensure even cooking. They'll take on a light pink color when done. You know you overcooked your shrimp if they curl into a super tight ring. No bueno.
  4. Sprinkle with salt and pepper to taste, and add the parsley and lemon juice to the pan. Stir well before removing the shrimp from the heat to a bowl off to the side.
  5. Return your pan to the heat and add the remaining 1 Tbsp oil. Add your spinach to the pan and saute a few minutes until just wilted. Stir occasionally to ensure the leaves on top cook evenly with the leaves on the bottom. When done, drain excess liquid from the pan.
  6. Plate by layering a helping of spinach and arrange your shrimp on top. You can spoon on some of the butter/oil/lemon juices from the shrimp bowl and then sprinkle with the toasted almond flour crumbs.
Toasting that almond flour into crumbs

Nothing like fresh ingredients!

About 30 seconds on the garlic is all you need.
If you fry your garlic for too long, it will get a burnt metallic taste.

Toss in them scrimps!

Careful not to overcook your shrimp or they'll become tough and chewy!


You may be questioning why so much spinach, well...

...spinach sure does shrink!

Plate by layering in a helping of spinach and arranging your shrimp on top;
sprinkle with your toasted almond flour crumbs and serve!

Yum!

Monday, February 2, 2015

Mint Cauliflower "CousCous"


Cauliflower is our token grain replacement for Paleo eaters. It makes a great rice or couscous, and mashes nicely like a potato. This incredibly simple recipe has hints of mint and lime and pairs excellently with lamb.

Ingredients
  • Extra virgin olive oil
  • 1 head cauliflower
  • 1/2 cup - 3/4 cup chopped fresh mint leaves
  • 1 lime, quartered
  • 3-4 scallions, sliced thin
  • salt and pepper to taste
  1. Pre-heat oven to 400F and grease a foil-lined sided baking sheet with a bit of oil.
  2. Core the cauliflower and cut it into florets. Pulse in the food processor in batches until your cauliflower has a couscous or rice-like shape and consistency. (Don't overload or some pieces won't hit the blade.) If you don't have a food processor, you can use a box grater.
  3. Spread the cauli-rice evenly on the pre-greased foil-lined pan and drizzle with a bit more oil. Bake for 20 minutes, or until slightly golden. Don't brown it. Stir halfway through baking to ensure even cooking.
  4. Transfer the cauliflower to a large bowl and mix in the scallions, 1/2 cup mint, and juice from two of the lime wedges. Add a pinch of salt, a bit of pepper, and drizzle with a bit of olive oil to lightly coat. (Don't soak with oil!) Mix it up and check for flavor. Depending on the size of your head of cauliflower, you may need to add more mint or more lime, or salt/pepper, etc. 
  5. Adjust the seasonings to your liking and serve!


Don't overload your food processor

Nice rice-like consistency

Ready for the oven!

Take it out before it browns. It should be soft enough to eat.

Cauliflower ranges in size, so adjust your seasonings as needed.

τέλος!
(FIN!)

Saturday, November 8, 2014

Hot Spiced Apples (In under 4 minutes!)


We went apple picking at the very end of the season and took home a pretty good haul of Fuji, Rome, Granny Smith, and Red Delicious apples.

The orchard was like a dream... an oil painting come to life.

But, as always, the dream ends and reality sets in that you have a full bushel of apples sitting on your table - and what the heck are you going to do with all of them?

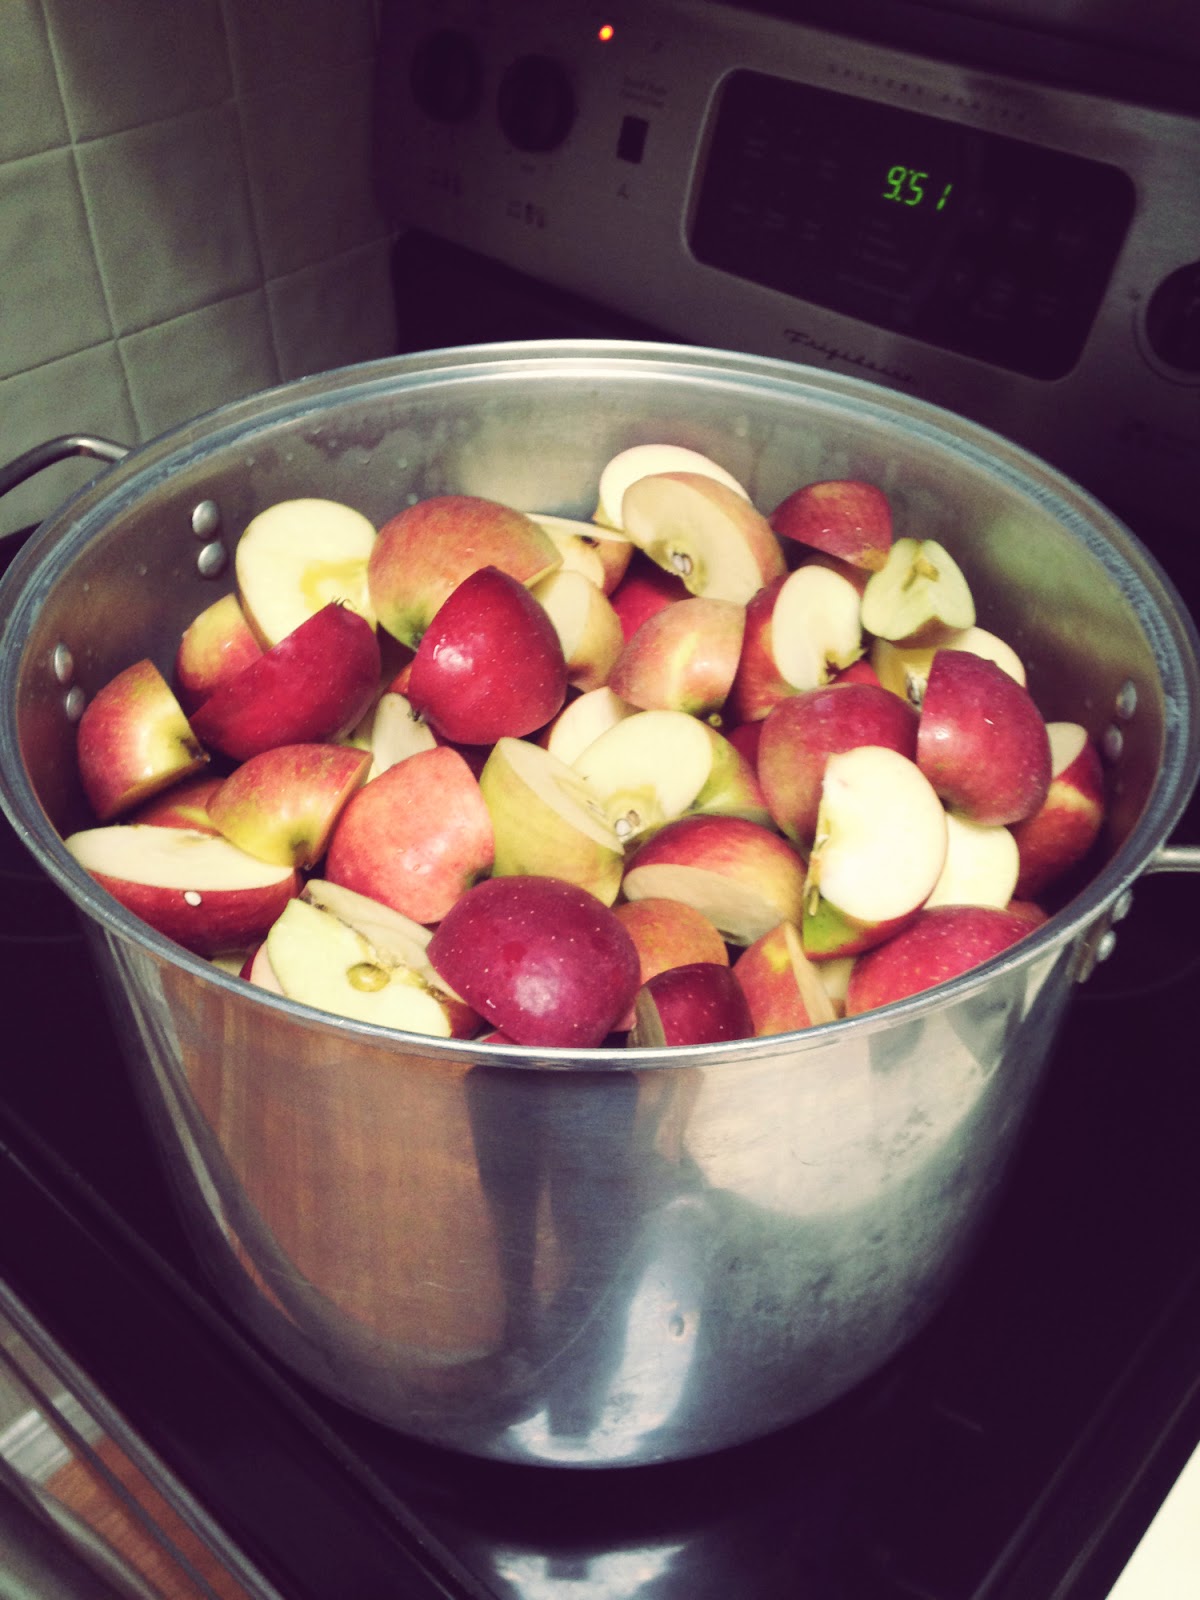
Just like last year, I made a huge pot of homemade applesauce. (Yes, that's grammie's big saucepot from my last post about meatballs.)

And I may have another apple-based recipe in the works soon. :)  But this morning I had a craving for a sweet, hot treat. I love baked apples, but I'm not always in the mood to do the prep and wait for the oven. This recipe for hot spiced apples is a shortcut recipe for traditional baked apples.

Ingredients

  • 1 apple (any kind)
  • Trader Joe's Pumpkin Pie Spice (or any warm, earthy spice like cinnamon, cloves, nutmeg, ginger, cardamom, etc.)
  1. Place the apple in the center of a microwave-safe plate and cover with a damp paper towel.
  2. Microwave for 2 and a half minutes, up to three and a half minutes, until the apple is completely soft.
  3. Use a knife to cut through the waxy skin around the stem and slice across the apple from one side to the other to spread the skin open and expose the soft apple meat inside.
  4. Sprinkle your spice over the apple, to taste.
  5. Enjoy!


The apple will usually burst at some point while microwaving
and some juice will seep out. I use this slit as one of the incisions
to open the apple up.


Take care when serving to small children - the apple seeds
will still be in there.
I love the Trader Joe's Pumpkin Pie Spice. Lots of other
spice brands have their own version of this, but
you can also just use your own combo of
warm and earthy spices.


Saturday, May 24, 2014

Broiled Broccolini


Broccolini is one of those weird hybrid vegetables that's a cross between broccoli and a chinese vegetable called kailaan. It may be an abuse of nature, but it's a delicious one. Summertime really isn't the ideal time to use your oven, but that's why this recipe is great because it only takes 10 minutes under the broiler, and you're done.

Ingredients

  • 1 bunch broccolini
  • extra virgin olive oil
  • salt, pepper, garlic powder to taste
  • juice of half a lemon (optional)
  1. Wash and dry the broccolini. If the bottom of the stems are rusty or discolored, trim them off, otherwise you can leave them be.
  2. Line a large sided baking sheet with foil and drizzle with a bit of olive oil. Line up the broccolini stems on the sheet (I tend to alternate the leafy side up vs down to make more room). (Pan should be broiler-safe.)
  3. Drizzle with more olive oil and season with salt, pepper, and garlic powder, to taste. If you appreciate a bit of lemon, you can also squeeze on the juice of half a lemon at this point. 
  4. Put the pan in the oven under a high broiler for 10-12 minutes. Until the tops are browned and slightly crispy. mmmm... crispy tops


Tuesday, December 3, 2013

Perfectly Poached Eggs

My husband and I took a trip to London last January and one of the best parts of the trip was the full English breakfast. This thing is massive - 2 poached eggs, 2 sausages, 2 pieces of bacon, fried mushrooms and tomatoes, beans, toast, and of course, tea. I behaved myself and didn't "tuck in" to the beans and toast, but the feast of protein was amazing. The surprising thing for me, though, was that I loved the poached eggs.
That's the glow of someone with full English breakfast in their belly.
As a child, I had an aversion to runny yolks. My brother would get his eggs sunny-side up and actually let the yolk run all over everything else on his plate... toast, bacon, didn't matter. I'd want to throw up just watching his egg yolk bleed all over everything. My eggs had to be WELL DONE or not at all.

But going back to my full English breakfast - the eggs arrived and I saw they were poached. Adopting the old "when in Rome..." attitude, I dug in. And could not believe the velvety deliciousness of the runny egg yolk. It's like believing Santa Claus isn't real, and then discovering he actually is. It was that kind of magical. It turned my world upside down because I was sure I HATED runny yolks. I don't think I can explain how truly life-altering this is.

Well, getting back home I now had to figure out how to poach my eggs myself because I'm not a breakfast at the Waldorf everyday kind of girl. It took me a few tries to get it down but now I can make myself this classy breakfast in no time.

Ingredients
  • 2 eggs (the fresher, the better!)
  • Dash of apple cider vinegar (or white wine vinegar)
  • Salt, pepper, and parsley flakes, to taste
  1. Crack your eggs into a small bowl (like a custard cup or prep bowl)
  2. Set about 2 inches of water on the stove in a large non-stick skillet or stock pot over medium heat.
  3. The water should heat until large bubbles form along the bottom, but should not simmer or boil. If you can stick your finger in the water without burning yourself, it's just right. (Be careful about testing this out, though.)
  4. When the water is ready, add the splash of vinegar and stir vigorously with a slotted spoon. It creates a little vortex so when you drop in the eggs they wrap around themselves to make the little pouch. The vinegar is to help the eggs stick to themselves easier. I've tried it without and still got my eggs to adhere, but I noticed my water was extremely cloudy so it was hard to see inside. I do think the vinegar helps.
  5. Using the cup, lay the eggs into the swirling water gently, but quickly. Don't drop them into the pot or else they'll come apart. It's kind of like putting a goldfish in a tank. Nice and easy. Unless you're some kind of sadistic fish torturer.
  6. Set a timer for 5 minutes and DON'T TOUCH THE EGGS. In fact, don't even THINK about touching those eggs. Just let them sit and do their thing. Even if it looks like the yolk is having an out of body experience, I promise it will poach itself.
  7. When the timer goes off, use your slotted spoon to gently lift an egg at a time from the water. You may have to lightly detach it from the bottom of the pot, which is why it's handy to use non-stick. If you're not sure if they're done, the yolk should have a little jiggle to it and the white should be completely cooked. You can test the yolk by lightly tapping with your finger. I sometimes leave them in a minute or two longer just to have a nice blend of texture with a thicker liquid yolk. You'll figure it out over time what you like best.
  8. Arrange eggs on a plate. You could blot the egg on a tea towel if it's too watery. If any little tendrils are left hanging on the egg just slice them off to make it look neat and pretty. Sprinkle with a bit of salt and fresh cracked pepper (and parsley flakes for some visual pizazz) and enjoy!
Keep the eggs in a separate small bowl so you can gently lay them into the pot
Water is just about ready when large bubbles form all along the bottom. Remember - no boiling!

Swirl the water around with your spoon

Sorry for the poor quality, but there was a lot of movement here.

Don't touch!

Still don't touch! Even though it looks like the yolks left the pouch, they really didn't. Put on your acid washed jeans and have Faith.

BOOM! Poached eggs! Jiggly yolk = perfect

If these eggs could grow arms, they'd be giving jazz hands right now.


C'est Magnifique!