Sunday, April 8, 2012

Almond Flour Breaded Chicken Cutlets


Nov. 26, 2013 - You may have noticed I've been trying to revamp some of my food photos, and where needed, provide updates to the recipes where I have honed them over time. No worries, this recipe is still pretty much the same, it just got a face lift!
---
I used to love breaded chicken cutlets before I went Paleo. I would eat them cold or hot. I don't see a reason why I have to give them up. Just swap out the bread crumbs with some protein-rich almond flour and... voilĂ !

The first time around I tried this, I used to dip the chicken in egg first, then the almond flour. I realized the egg is not necessary as the chicken is moist enough for the almond flour to stick all on its own. This cut down the time it takes to make this meal by a lot.

I prefer to use the thin-sliced chicken breast, but the thicker cut will work. You may want to pound thicker cutlets a little flatter, though and note they will take longer to cook through. The almond flour you use can be blanched or unblanched - it makes no difference. I actually prefer the unblanched because the speckled appearance reminds me more of real breadcrumbs. But taste-wise, makes no matter. I posted my recipe for Italian seasoned bread crumbs to help you take the guesswork out of the seasoning.

Just remember to season your almond flour BEFORE you bread the chicken with it! Otherwise, the chicken may not have as much taste as you might like.


Ingredients


1. Spread the cup of seasoned almond flour in a large shallow dish. Dip each cutlet in the almond flour to coat both sides and set aside on a plate.

2. Heat 1-2 tablespoons of the butter (or oil) in a large nonstick frying pan over medium-high heat.

3. Fry the cutlets in batches for a few minutes on each side until the almond flour is browned and chicken is cooked through. Add more butter/oil to the pan as needed.


This was the old food photo back from the original post on Facebook. Blech!

aaaaaah much better

Mmmm... photography


Recipe Test - Surf and Turf


Surf and turf is a combination meal of seafood and meat. When most of us think of surf and turf, lobster and steak usually come to mind, but this version from Chef Bryce of thewayfoodshouldbe.wordpress.com combines atlantic sea scallops and chicken livers. This is a mind-blowingly brilliant combination, and a very quick meal - perfect for weeknights.

Now the kid in you may be going, "ewwwwww chicken liver!" but I assure you, not only does this taste amazing, but there are a ton of health benefits as well. Yummy organ meats are brimming with nutrients. Below is a helpful list put together on HealthMad.com of what you get when you eat chicken liver:

1. Helps prevent anemia (Vitamin B12 – 352%)
Chicken liver can supply the body with over three times the daily needed value of vitamin B12, an essential nutrient which supports the production of red blood cells and helps prevent pernicious anemia.

2. Promotes good eyesight (Vitamin A -288%)
Many people probably didn’t know that it is brimming with vitamin A in the form of retinol, alpha and beta-carotene including lycopene. At 14378 IU, it’s a very powerful supporter for healthy vision.

3. Helps promote fertility (Folate – 140%)
If you’re pregnant or planning to get pregnant, chicken liver is good for you. With its 560 mcg of folate, it helps promote fertility as well as prevent neural tube defects for the developing baby.

4. Promotes healthy tissues (Riboflavin -136%)
Soreness around the lips, mouth, and tongue and cracking and/or peeling of the skin at the corners of the mouth and around the nose indicates a lack of riboflavin in the body. Riboflavin, also known as vitamin B1 is essential for normal reproduction, growth, repair and development of body tissues including the skin. Chicken liver is loaded with 2.3 mg of riboflavin.

5. Keeps thyroid healthy (Selenium – 126%)
It is also brimming with selenium, a mineral which supports iodine to keep the thyroid gland in top shape.

6. Helps the body fight stress (Pantothenic Acid – 83%)
With its rich pantothenic acid, it helps the body combat stress by supporting the adrenal glands.

7. Keeps immune system healthy (Iron – 72%)
In addition to its role in preventing anemia, iron also keeps the immune system in top condition and chicken liver is an excellent source of this essential mineral.

8. Helps prevent pellagra (Niacin – 70%)
Lack of niacin supply in the body will show in the form of pellagra, a disease with symptoms that include delusions, diarrhea, inflamed mucous membranes and scaly skin sores. Chicken and tuna are some of the highest sources of niacin.

9. Promotes healthy skin, hair and nails (Protein – 52%)
One of the many health benefits of protein is keeping the skin, muscles, hair and nails in top condition and chicken liver is another excellent source of this very important nutrient.

10. Helps keep teeth and bones healthy (Phosphorous – 42%)
It is also good for the teeth, gums and bones through its rich phosphorous content as calcium cannot build teeth and bones without the aid of this mineral.

Now that I hope I have you at least interested in the idea, here is the recipe! If you do it right, your liver will be seared and a bit crispy on the outside, but soft on the inside and your scallops will be caramelized on the outside giving it a sweet flavor. Chef Bryce actually posted a video showing you how to prepare this, but didn't write the recipe down so I've done my best to capture everything below.

Ingredients

  • Chicken livers (usually sold in a pint container in the meat dept of your grocery store)
  • Clarified butter, ghee, lard, or olive oil (for frying)
  • Large north atlantic sea scallops
  • Salt and Pepper to taste
  • 1-2 Tbsp coconut oil
1. Prep your chicken livers by rinsing thoroughly and patting dry with paper towels. There is a membrane running down the middle of the livers - cut it off with a sharp knife. This will separate the liver into two halves.

2. Prep the scallops by rinsing and drying. Your scallops may have a little "foot" still attached to it. This is a tough piece of muscle that used to attach the scallop to its shell. You can pull it off, or cut it off with your knife.

3. Sprinkle your chicken livers and scallops with salt and pepper. Heat a nonstick frying pan over medium high heat and begin to melt a few spoons of clarified butter. (You could choose another oil of your choice such as ghee, lard, etc.)

4. When the pan is nice and hot, hold it up and away from the heat and gently lay each chicken liver down inside. We will do the scallops after the liver is done. Because the liver and scallops contain a lot of moisture, they will cause the oil in the pan to sizzle and pop pretty violently, so take care. Wait until you get a nice sear on the bottom of the livers and then flip them over. Fry another few minutes until both sides are seared and the center is cooked through but still soft.  Move your chicken livers off to the side.

5. Add more butter to the pan and gently lay in the sea scallops. In about a minute, the bottoms should be nicely seared and you can flip them over. At this time, take a nice spoonful of coconut oil and drop it into the pan. Coat the scallops, both sides, in the melted coconut oil to add a bit more sweetness and flavor. Wait another minute or two until the other side of the scallop is nicely caramelized and the center is cooked through and remove them from the heat.

6. Your chicken liver and scallops are ready to serve as is. Chef Bryce paired them with a bit of dandelion greens with olive oil, salt, pepper, and fresh lemon juice. I paired it with roasted kale.

ENJOY!

cut off this membrane

season with salt and pepper

season these bad boys with salt and pepper, too


Sunbutter!


A lot of people miss peanut butter on Paleo as it is verboten. I was never that attached to peanut butter, but for my husband, it's like human catnip. We could go to the specialty food store and get sunbutter which is a very yummy close comparison, but why pay so much when you can make it at home for... PEANUTS! (Not literally peanuts - you know what I mean.) I searched around a lot online researching the best way to do this and everyone has their own thoughts on the matter. From what I researched, I developed the below recipe which worked like a charm.


Why sunflower seeds over peanuts? Well, they're good for your heart due to having no cholesterol content and containing cholesterol-fighting phytosterols which lower bad cholesterol (LDL) and increase good cholesterol (HDL). They’re also rich in fiber, minerals like zinc and calcium, iron for blood and also magnesium, selenium, and lots of folic acid (for cancer fighting!). Sunflower seeds also have very high levels of Vitamins B and E. If you've read the Peanut Manifesto on the Whole 9 website, you know that peanuts (which aren't even really nuts, but a legume) contain lectins which are commonly associated with aggravation of inflammatory and digestive diseases in the body. They can also harbor carcinogenic mold called an “aflatoxin“. Ewwwww.


Ingredients
  • 1 16oz bag raw sunflower seeds (do not get the ones that are already roasted as they will not have enough moisture and result in a mealy sunbutter)
  • 3/4 tsp sea salt
  • 1 tsp palm sugar (or other sweetener of your choice)
  • 1 tsp honey
  • 2 tsp olive oil

1. Preheat oven to 350F. Line a large baking sheet with parchment paper or foil and coat with a light spray of oil. Spread out your sunflower seeds evenly and spray with a light mist of oil. (I buy extra virgin olive oil spray in the grocery store. You could forget the oil completely as sunflower seeds will release their own, but I like to give them a little help. You could also toast them in a pan on the stove if you can't use your oven.)

2. Put the pan in the oven, checking the level of "toastiness" every few minutes. The seeds should be LIGHTLY toasted, not brown. If your pan wasn't big enough to create a single layer of seeds, be sure to mix them up partway through cooking so the seeds on the top don't cook faster than those on the bottom. Mix as often as necessary until they look uniformly toasted. (As you can see in the photos below, some of my seeds that came in contact with the metal sides of the baking sheet became very brown. I just left those few overdone ones out and snacked on them as I made the sunbutter.)

3. Combine the toasted sunflower seeds in a blender with the sea salt and palm sugar. If you have a high power blender like a VitaMix that comes with a tamper (looks like a plunger) then process on highest variable speed and use the plunger to push the mixture down into the blades. If you do not have a tamper, you may have to stop the blender periodically to push the mixture down with a wood spoon or spatula. You could also use a food processor on high, but this may take a bit longer. At first, the mixture may look mealy, but keep chugging along and processing it until it begins to look creamier and get a light sheen. Sunflower seeds release their own oils over time - so have patience! You could be processing the mixture up to 10 minutes straight. At about the 5 minute mark, it should definitely start looking creamy, though. At this point, you could add in your teaspoon of honey.

4. Once the mixture gets fairly creamy, add in your olive oil one teaspoon at a time, processing in between. You can lower the speed of your blender just enough so that it will blend the oil in without need to be pushed towards the blades. The result should be a nice creamy sunbutter.

5. Your mixture may be hot, so spoon it into a mason jar and let it cool off to the side. Once cooled, seal tightly and store in the refrigerator. The mixture may separate if left in the fridge for too long, so if that happens, just give it a good stir before serving.


Saturday, April 7, 2012

Zucchini Noodles


Had I never discovered the joy of zucchini noodles, I may never have been able to stay Paleo as pasta was a HUGE staple of my pre-Paleo diet. The following recipe will teach you how to take a zucchini and trick your mind into thinking it is eating spaghetti. Use this as a substitute for any recipe that usually takes pasta, or you could mix it into soups as well.  Try it with:

- Chicken Cacciatore
- Classic Chicken Soup
- Moroccan Meatballs
- Shrimp Fra Diavolo
- Steak Pizzaiola

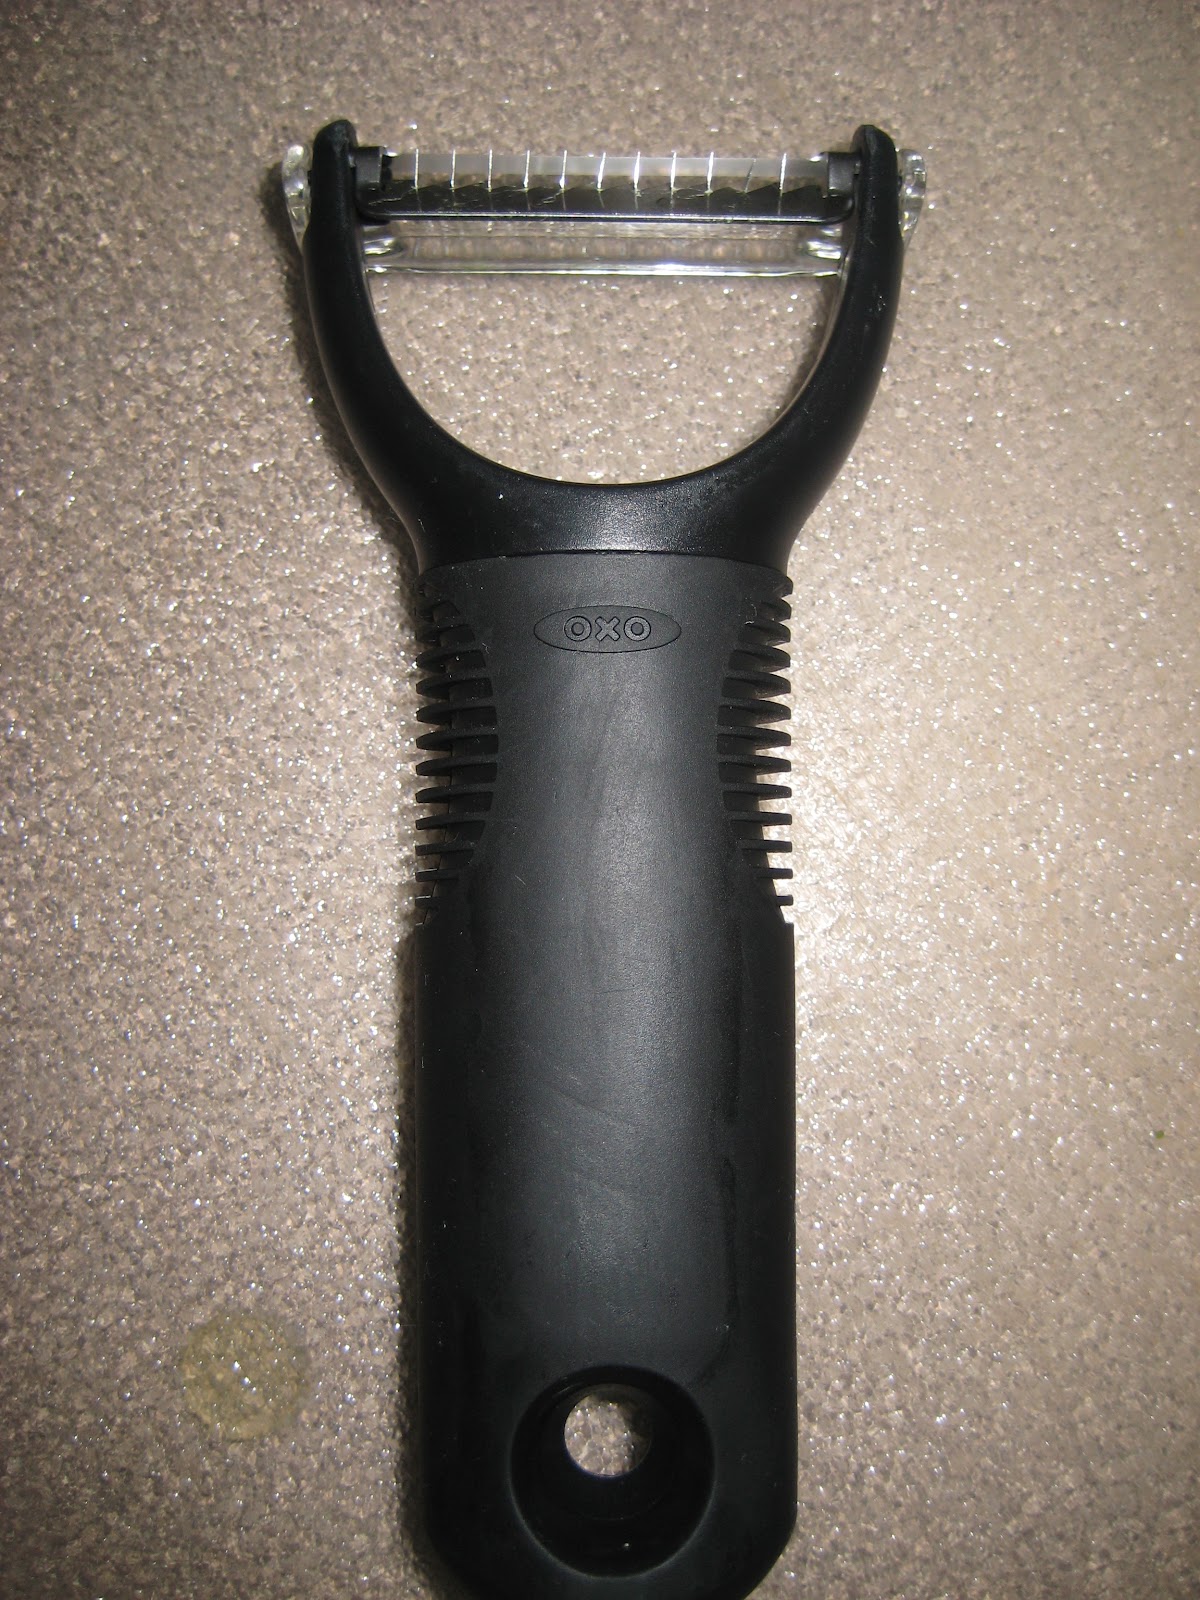
You will need some sort of tool to efficiently julienne the zucchini. Doing it with a knife is waaaay too time consuming. I've used both a julienne peeler, and a mandolin slicer. The julienne peeler is probably more common for you to have in your kitchen and will take up a lot less room.

I usually julienne a minimum of 4-6 zucchini at a time to feed the both of us. To use the julienne peeler, slice off the bottom and grasp the zucchini by the stem. Run the peeler from the bottom to the stem until you reach the seeds; repeat around the entire outside of the zucchini. You can discard the seedy core because when you heat it up, this part will get fairly soggy and less noodle-y. But if you really don't want to waste it, you can go ahead and julienne it. It won't kill anybody.

slice off the bottom

A julienne peeler looks like a regular y-shaped peeler
only it has little teeth spaced out along the blade
to cut the vegetable into those thin strips

bottoms up!


To use the mandolin slicer, make sure you put on the small julienne slicing blade. Cut the stem off the zucchini and run it through the mandolin on all sides until you reach the seeds. Discard the seedy core.


Once you've finished julienning the zucchini heat some extra virgin olive oil in a large frying pan or saute pan on medium-high heat. Saute the zucchini only a few minutes until evenly heated and soft enough to twirl on a fork without snapping in half. There's no need to season it if you plan on mixing it in with some kind of sauce. Don't overcook it otherwise it will be a soggy mess.* I like to serve it a bit aldente.


*Salting Method: To reduce the "wateryness" of the zucchini you can use a technique to draw the additional water out prior to cooking. Place the freshly julienned zucchini in a large collander in the sink or over a bowl and coat it liberally in salt. Allow it to sit for about half an hour and then rinse the salt off thoroughly with water. Pat dry. You may now proceed to the step above of sauteeing it.


Citrus-Herb Stuffed Whole Roast Chicken

So I know everyone has their own method for making a roast chicken, but in case you want to try something new (or maybe you've never done it) here is my own recipe. The citrus fruits not only flavor the meat really nicely, but also ensure the meat stays moist. After all, there's nothing sadder than a dried out chicken.

Ingredients:

  • 1 whole oven roaster chicken
  • 1/2 an orange (I used Valencia), cut into quarters
  • 1 lemon, cut into quarters
  • 5 garlic cloves, peeled
  • a few sprigs of fresh rosemary, thyme (go heavy on the thyme), sage, marjoram, and savory 
  • Extra virgin olive oil (EVOO) or grapeseed oil
  • kosher/sea salt, to taste
  • fresh ground pepper, to taste
  • garlic powder, to taste

1. First is the icky part of preparing the chicken. Reach inside and pull out the packet of giblets if there is one (don't be afraid to toss these in the pan and roast with the chicken... they're delicious!). Rinse the chicken off inside and out with cold water. Pull off any bits of fat that may be sticking to the cavity and trim off any extra skin hanging off the body. If the neck is still attached, cut that off as well. Now very importantly, pat your chicken dry with paper towels or kitchen towels. Make sure whatever you use won't leave lint behind, though. (Drying it off thoroughly is what will make it crisp up nicely on the outside once you bake it!)

2. Next, prepare all the items for stuffing. Wash and dry the herbs thoroughly, and rinse the outsides of your lemon and orange and dry. Peel your garlic cloves. Cut your lemon and orange wedges. If you have a smaller chicken, you may need to cut your citrus into smaller slices so that they more easily fit into the cavity. As the recipe is written, with half an orange, and a whole lemon, you should have 4 pieces of each.

3. Time to stuff!  Put a few pinches of salt in your hand and rub the inside of the cavity well to distribute. Do the same with some fresh ground pepper. Take a piece of lemon or orange and squeeze it slightly inside the cavity and then rub it around. Leave this piece lying face down all the way inside. Do this again with 3 more pieces of fruit, being sure to alternate so that you have 2 pieces each of lemon and orange lying face down in the cavity. Toss in a few cloves of the garlic. Take all your herbs and form them into a bouquet and lay them down on top of the bed of citrus inside the cavity. Take the last pieces of orange and lemon and do the same thing as the first time by squeezing and rubbing. Lay them down, this time face up with the meat of the fruit facing the cavity wall on top. Stuff the rest of your garlic inside.

4. Time to season the top. Take the tiniest drizzle of EVOO or grapeseed oil and rub it all over the skin. There shouldn't be any dripping or any visible excess. Sprinkle the top with salt, pepper, and garlic powder to taste. Feel free to sprinkle anything else on top there that you think you'd like!

5. Transfer to a roasting pan with a rack and bake at 375 degrees about 20 minutes per pound. If your chicken doesn't come with one of those handy dandy pop-up buttons which tell you when it's done, you can use a meat thermometer and insert it into the meaty part of the thigh. The thermometer should read at least 165 degrees to be safe. If you have neither the little button thingy, nor a meat thermometer, you can slice that part of the thigh open and see if the juices run clear and if the meat has turned white. If you notice any blood run out or see any pink meat, it's still got longer to go.

6. Be sure you take the chicken out often to baste it! This will stop it from burning, keep the meat moist, but also distribute the most AMAZING flavors all over your chicken. If you find you are not getting much juice dripping out, you could pour some chicken stock over top of your chicken. If you notice your chicken is browning a little too quickly cover it loosely with foil which will slow that down.  When the chicken is about done, remove the foil and let it bake for another 10 minutes to crisp it up nicely. Let it sit like 10 or 15 minutes before you carve it up.

mmmm... stuffing

ready for the oven

hey, don't waste them giblets! liver, gizzards, heart, and neck - yum!

toss those giblets right in the pan with a little oil and
remove them once they're nicely roasted

you may have to lightly tent your chicken with foil if it starts to brown too early
Done!

Recipe Test - Roasted Green Veggies and Grapes


This recipe is from whatigather.com. It looks very similar to a main dish recipe I make for Chicken Breast with Roasted Vegetables. Instead of grape tomatoes, the blogger used seedless red grapes - GENIUS! As a personal preference, I usually don't like crunchy nuts with soft vegetables so I probably would omit the walnuts next time - but I think I'm in the minority when it comes to that stuff.

Ingredients:

  • 2 cups chopped broccoli florets
  • 1 cup red seedless grapes
  • 1/2 large red onion, cut into thick slices
  • 1 bunch asparagus (about 1 lb), white ends removed and cut on a diagonal into 2-inch pieces
  • 1 tablespoon extra virgin olive oil
  • Salt and pepper to taste
  • 1/2 cup walnuts


  • 1. Preheat oven to 400 F.

    2. In a large bowl, toss the broccoli, grapes, onions and asparagus with the olive oil.

    3. Season with salt and pepper.

    4. Transfer contents of bowl to a large pan and roast for 15 minutes.

    5. After 15 minutes, add walnuts and stir well. Return to oven for an additional 15 minutes. When finished cooking, grapes should be blistered and broccoli and asparagus should be just starting to brown.


    Ready for the oven!
    Done!

    Wednesday, April 4, 2012

    Recipe Test - Moroccan Meatballs


    Last night I tested out this recipe for Moroccan Meatballs which comes from the Paleo cookbook Well Fed by Melissa Joulwan. This has become one of my favorite cookbooks for dinners and sides. My cooking has always leaned towards more Italian-style recipes and her recipes have given me an opportunity to explore a lot of new exotic flavors and experiment with spices I don't normally use.

    True to form, this recipe was a slam dunk and I followed it pretty exactly from the book. I didn't have pistachios for the garnish, so I did omit those. The recipe also directs you to form your meatballs by measuring each as a level tablespoon, but I actually used my meatballer tool which gave me slightly bigger meatballs. I don't think this made a difference either way.

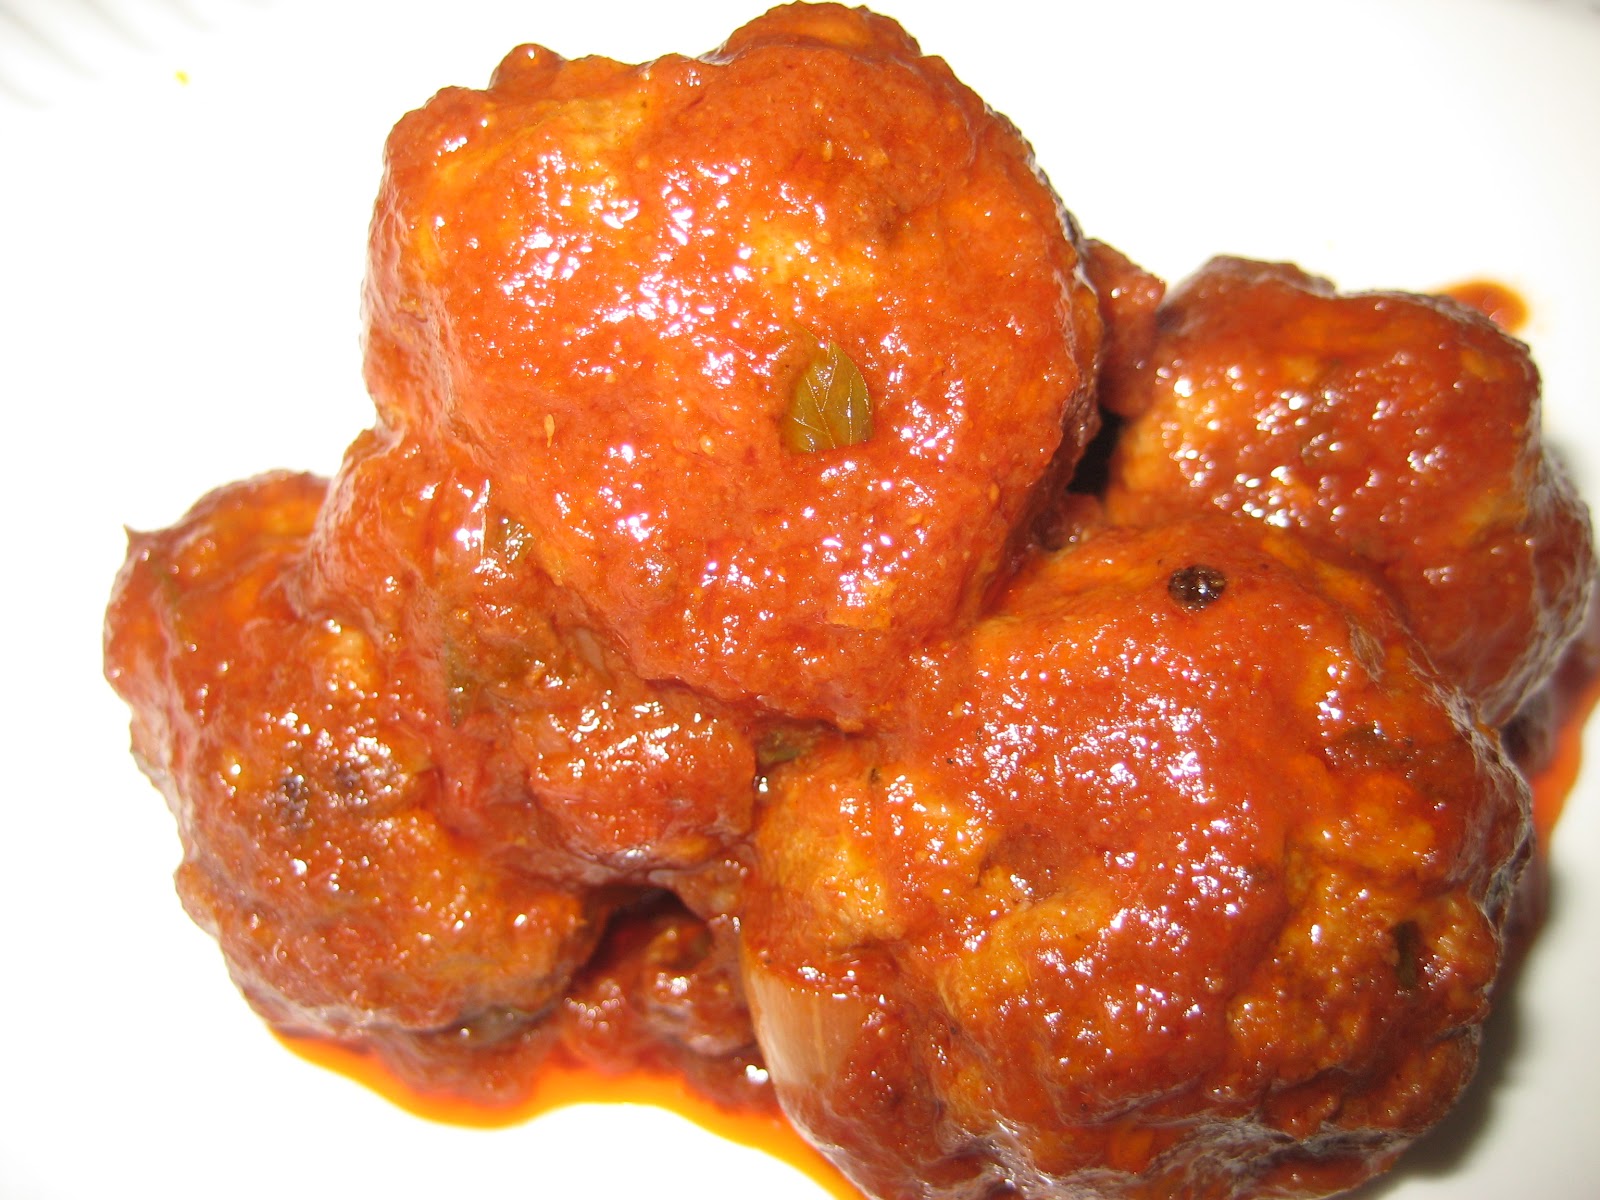
    I was a bit thrown off when I finished cooking the meatballs as I didn't think they looked anything like the picture in the book. The book's photo shows the meatballs looking browned and not coated in any kind of excess sauce. As you will see from my photos, I actually was left with plenty of the nice, thick, delicious sauce. The sauce was really the best part of the dish. Had I realized there would be so much left, I probably would have served this recipe over zucchini noodles. Oh well - next time!

    Ingredients

    Meatballs:
    • 1/2 cup fresh parsley leaves, minced (about 2 Tbsp)
    • 1 Tbsp paprika
    • 2 tsp ground cumin
    • 1 tsp salt
    • 1/4 tsp black pepper
    • 2lb ground lamb
    Sauce:
    • 1 Tbsp coconut oil
    • 2 medium onions, diced (about 2 cups)
    • 2 garlic cloves, crushed
    • 2 tsp paprika
    • 2 tsp ground cumin
    • 1 tsp salt
    • 1/4 tsp ground black pepper
    • 2 medium tomatoes, diced (about 2 cups)
    • 1 1/2 cups water
    • 2/3 cup tomato paste
    • 1/2 cup fresh parsley leaves, mined (about 2 Tbsp)
    Garnish:
    • 1/4 cup roasted pistachios, chopped
    Directions
    1. In a large mixing bowl, combine the parsley, paprika, cumin, salt, and pepper with a fork. With your hands, crumble the lamb into the bowl and knead until all of the ingredients are incorporated.
    2. Moisten your hands with water and shake to remove excess. Measure a level tablespoon of lamb and roll into a ball between your palms. (I used the meatballer to do this.) Line up the meatballs on a baking sheet until it's time to put them in the sauce.
    3. Heat oil in a large deep skillet or pot. Add the onion and saute until soft, about 5 minutes. Add the garlic, paprika, cumin, salt, and pepper and stir until fragrant, about 30 seconds. Add the chopped tomatoes to the pan and stir about 1 minute. Add the water, tomato paste, and parsley, mixing to dissolve the tomato paste.
    4. Bring the sauce to a boil, then gently place the meatballs in the skillet, cover, and reduce heat to simmer. Cook 40 minutes covered, then remove the lid and cook an additional 20 minutes until the sauce has thickened. Sprinkle each serving with a few teaspoons of chopped pistachios.
    mmmm meat!

    This is my meatballer tool.


    Sauteed onions in coconut oil.

    Added in the spices.

    Added in the tomatoes.

    Added in the rest of the ingredients.

    Dropped in my meatballs.

    Almost finished cooking. See all the nice sauce left!